After five long years I finally received another run of custom lacquered litz cable from Draka France, and am producing interconnects again. Individual cable strands are high purity copper with heavy silver plating and individually lacquered before being wound into an equi-length litz braid and jacketed in PTFE. Once trimmed to length and tinned, individual cables are immersed in liquid nitrogen and subjected to multiple timed short duration high power variable frequency RF pulse trains that fully anneal the silver strike, and drive impurities at the silver to copper interface into the copper core via solid state diffusion. Once stabilized, the treated individual cable leads are carefully woven into a three wire braid with spacing optimized to minimize stray capacitance. A key component is the introduction of a third ‘null’ lead that acts to attenuate RF pickup and minimize capacitance. RCA connectors are US made Switchcraft, with epoxy potting for strain relief. The resulting cable is extremely neutral and delivers a clear natural sound. This can be attributed to the ultra low impedance and minimal capacitance (guaranteed to be below 48pF / meter).
I have built and delivered about 100 pairs of these over the past 10 years, with zero returns or complaints.
Accounting for fixturing and termination losses, I estimate that I have enough raw cable to build out approx. 30 standard pairs of cable, and this is very likely the last batch of cable that I will receive – US manufacturers simply have no interest in small custom batch orders, and Draka France has such a backlog that they aren’t even accepting new custom orders.
The first DHT amplifier that I built was a 71A. It was a bear to tame. The low power output (0.7 watts) dictated extremely high efficiency speakers, which were in turn very susceptible to AC filament hum. The 71A did me no favors there as it operates at twice the filament voltage as its descendants, the 45 and 2A3. Despite its shortcomings, there was something special about the sound. I loved listening to it through the most efficient speakers that I had at the time – a pair of Coral Fe103s in a large infinite baffle setup. It sounded better and different than anything else I had built to that point, but in the end, it just didn’t have enough ‘oomph’. I ended up re-wiring it for 45s before passing it on to its next steward.
In the years since, I have thought about that amp a lot. With the Granit Prime Circuit turning into a Rube Goldberg Masterpiece, I recently decided to take a step back and give the 71A a second look. Two things would have to be overcome: Filament hum, and the anemic output power. DC filaments would be the easy answer to the first, and the tube was designed for battery operated sets in the first place. As for output power, there is only one way to squeeze more power output from the tube – operate it in Class A2 by allowing the grid to be driven positive with respect to the cathode. I can find no examples of this having been done before with the 71A, but it has been done on both the 45 and 2A3 with good success. Peeking inside, the internal construction of the grid looks substantial enough that it should be able to dissipate a fair amount of power without evaporating itself.
Starting with the RCA datasheet curves, I plotted out my best guess at what the gridlines would look like for +10, +20 and +30 volts. I’m sure they aren’t exact; they may not even be close. Next, I super-imposed the maximum plate dissipation curve (5 watts) onto the graph. Plotting a 5KW load line, I snugged it up right against that maximum dissipation curve. A lower load impedance would give more power, but at the cost of linearity. With a grid swing of +/-50V at a peak value of +30V yields a nearly symmetric plate swing of 230V – good enough for 1.32 watts! that sounds even bigger when you call it out in the vernacular of the original RCA datasheet: 1320 milliwatts! The plate curve with these operating parameters is shown below.
Now the question becomes – Is this accurate? And, if it is, can it be achieved? To get the ground truth, I wired up a NOS 71A Sylvania Coke Bottle tube with the basics. AC filaments, Tamradio output transformer, HV power supply, and a reworked version of my Skylark drive circuit. Adjusted to the idle point shown above and with +/- 50V of grid drive. Maximum clean power output came out even higher than predicted @ 1430 milliwatts. In the curve trace below, the top crest of the waveform is the positive grid peak. The flattened bottom trough of the wave indicates the distortion is coming from the negative grid region where the plate curves start to compress together. Harmonic content at this output power is still a very clean 1.28%. For comparison, a 45 driven to its maximum class A output with the same load impedance and grid swing predicts 1320 milliwatts @ 1.9% THD. I am going to give an emphatic ‘Yes!’ that the 71A can absolutely be up-gunned to match any SE 45, and probably some of the 2A3s out there as well.
71A DHT Class A2 Power OutputTotal Harmonic Content @ 1 KHz, 1.43 Watts
Oh – yeah, about the sound. Even though it is mono, and sloppily wired, it is magical. All of the sweet sound that I remember, but with the punch that was missing before. I can’t wait to get this built out right and in stereo. You can follow the design and build progress on my ‘Oncilla’ page – replacing Granit Prime.
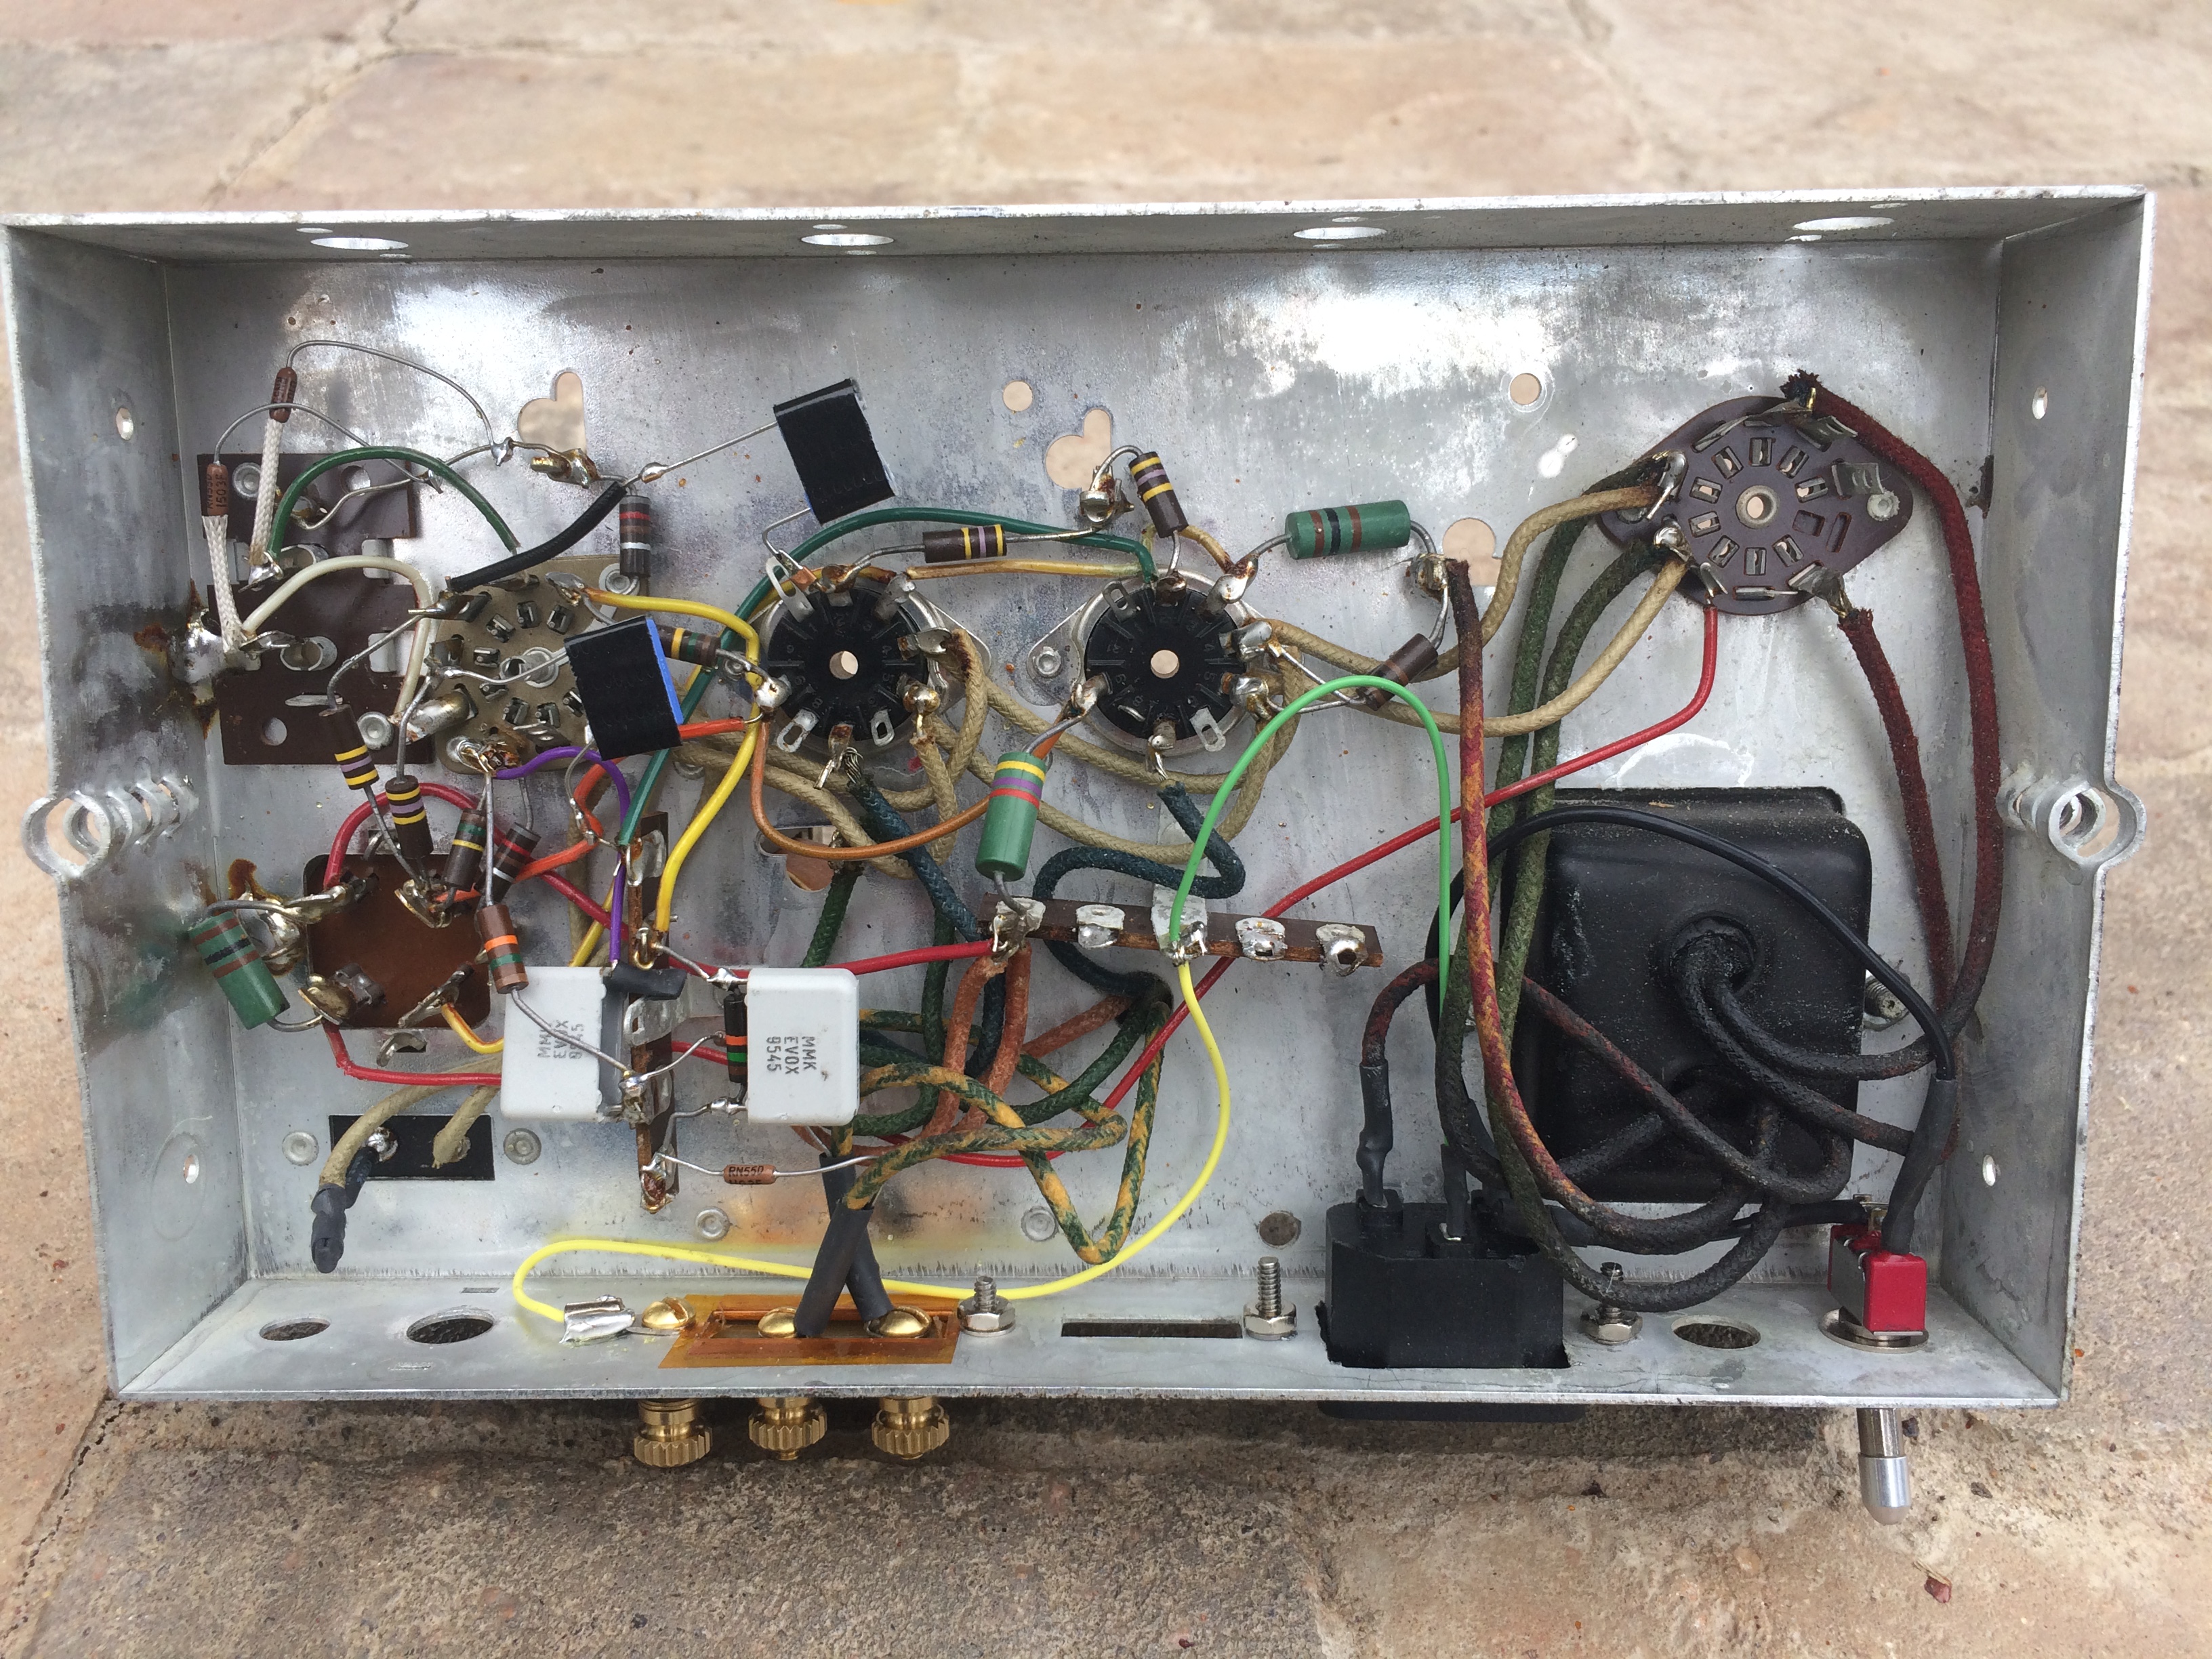
This one is a departure from the norm for me. I usually don’t dabble with solid state, but when I found this early Magnavox Transistor amp, I was intrigued. The transition from vacuum tubes to transistors didn’t happen overnight. Many of the first solid-state amplifiers were designed and built by engineers who had spent their career designing with tubes, so many of the early SS designs shared a lot of DNA with their hollow-state progenitors. This specimen is pretty spiffy – the design implements an entirely conventional single ended RIAA preamp, feeding a transistor driven transformer phase splitter for the big TO-3 push-pull output transistors. If you look closely, you can see that the factory assembly technician mixed up the installation of some of the capacitors. Both speaker coupling caps should have been 250 mfd and are installed in close proximity to a 100 mfd power supply filter capacitor. Unfortunately, the tech installed one of the 250 mfd caps in the power supply, and the smaller 100 mfd cap on one of the speaker outputs. Hard to say how much this impacted frequency response. Given the speakers that were originally fitted to the console, it probably wasn’t very noticeable. Listening to the amp on the bench was pretty un-impressive to start. Driven with ‘flat’ line level inputs, the RIAA equalization circuit enforced a frequency response curve that looked more like the bell curve from my 1st semester calculus class than anything else. Balance control implementation was the same wonky ganged feedback to ground adjustment that Magnavox was so enamored with on their tube amps.
My first act as rehabilitator in chief was to rip out the accursed RIAA preamp and tone and balance controls. In place of the balance potentiometer, I installed a single 200 ohm resistor between the feedback loopback and ground for each channel. Directly driving the phase-splitter/preamp gave a much-improved tonal result. Convinced I had a solid starting point, I went ahead and tore out the AC feed, all the power supply rectification and filter caps, along with the remaining circuit capacitors.
Building it back better, I spent 3 million dollars on a handful of new components and promptly lost most of them in my workshop after burning the invoice so I couldn’t return what I had left. Wait – that’s another story. Sorry…
What I really did do was install a new IEC power entry point, massively increased the B+ filter capacitance while retaining the original cool selenium rectifiers, now wired in parallel with modern diodes.
I also replaced all the circuit capacitors with top-shelf modern upgrades. The original carbon comp resistors checked out okay, but I did go ahead and replace the fixed feedback and balance resistors with trimpots to allow me to tune and balance the channels against each other. Finishing touches include a clear lexan baseplate, Bolivian Rosewood faceplate and uber-cheesy and ratty looking LED power on indicator lamp. Speaker connectors are still the stock spade connectors, but I did build up a pair of pigtails that convert to banana jacks for my testing. The proud new owner will receive those as a ‘special free gift’.
How does it sound, you ask? Coming from me, an ardent poo-pooer of all things solid state; pretty good. Keep in mind that a lot of the mojo folks associate with tubes really comes from the transformers. The soft inductive coupling is really where the magic is at, but let’s keep that to ourselves for right now before we stir up a controversy.
The amp delivers a clean output up to and beyond 5 watts into an 8 ohm load. Total harmonic content @ 1 kHz / 1 Watt is a smidge over 0.5%, raising only slightly to 0.58% @ 5 watts. As shown below, in the linear operating range even order harmonics dominate, and the frequency decay is a nice exponential. Soft clipping onset occurs at around 7 watts where the third order odd harmonic starts to dominate, driving THD up to 2.6%.
Frequency response is well matched to just about any full-range driver that you would be tempted to use. Minus 3dB points referenced to 1 kHz @ 5 watts are 18 Hz / 18kHz respectively. I contemplated adding a low pass filter in the feedback circuit to shore up the HF response, but selective feedback can tend to just homogenize and dull overall presentation. Remember, the goal here was not to build a zero distortion, infinite bandwidth lab quality signal amplifier. And, yes, in my younger days I did smuggle in speakers and a source to my employer’s lab to listen to music on a hi-zoot linear amplifier. It sounded absolutely hateful. That experience was one of a handful that eventually put me off solid state almost entirely.
After listening to this one as it is, I am convinced the current setup is the way to go. Sound is nice and warm, with a good tubey-vibe. Reminds me of a really clean SE EL84 but with more power.
There are couple of items you should keep in mind when considering this amp. One is the fact that the input sensitivity is a bit low. You are going to need a preamp that delivers close to professional line level outputs (+4 dBu) to get the full power output of 5 watts. The other is that there is no power switch – plug it in, and the amp is ON. I have been on a bit of an automation bent lately and had both the amp and its preamp connected to an Alexa enabled plug. When I wanted music, it was easy. I just had to say, “Alexa, turn on the Magnavox”, followed by “Alexa, play Johnny Cash”. If only everything in life could be this easy…
Here is a fun amp that has been percolating in build for over three years. Pre-pandemic I was originally going to build a generic follow-on to my previous 6AM4/EL84 SE amp, this time refining the circuit to add voltage regulated screen grids on the output tubes. And then I watched the first season of the Mandalorian on Disney+, and I knew I had a new theme.
First, the skinny on the circuit, and then we can talk about the aesthetics.
The amplifier circuit itself is rather conventional: Single ended 6BQ5/EL84 output stage, operating in pentode mode, driven by triodes with a moderate level of negative feedback. Rather than the ubiquitous 12AX7, I went with a rather unknown gem, the 6AM4. This little ‘acorn’ triode delivers similar gain characteristics as one of the triodes inside the 12AX7, but it was specially designed and ruggedized internally to support High Frequency (for the time) Radio signals. It is a hard one to tame for audio applications however and will exhibit oscillation and feedback issues without careful wiring and isolation as it was originally designed for grounded grid operation. Certainly worth a read of its data sheet if you have time – very smooth and symmetric gain behaviors deliver crisp signal amplification.
The other piece of the puzzle that sets this amp apart sonically is the fact that the screens on the output pentodes are each individually powered and regulated. There are lots of opinions out there on the relative merits of this approach, but I have found that the extra circuitry and hassle of ‘dialing-in’ the voltages is well worth the sonic reward.
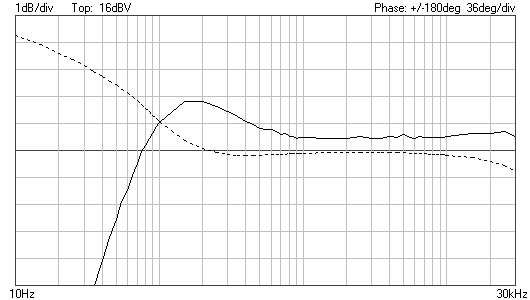
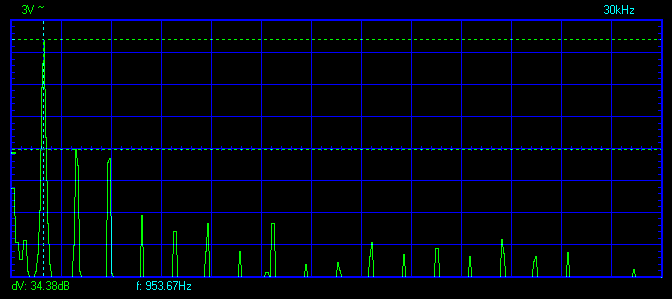
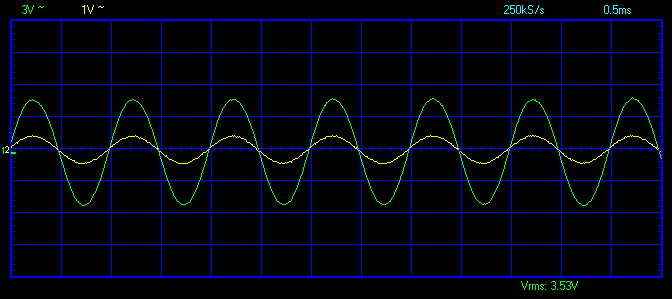
Quantitative amplifier performance specifications are all shown in the photos, but I will list them here as well. At 1 Watt RMS output @ 1kHz into an 8 ohm resistive load, THD is right at 0.5%. At the rated power of 3 Watts, THD sits around ~1.4%. As the amp pushes into soft-clipping at close to 4 Watts, THD still remains stable and low at just over 2%. For comparison, I also have plotted the harmonic spectrum for the amp at 3 Watts of output if it were to be operated with no feedback stabilization. Frequency Response and phase error for both channels is excellently matched, and the audio power band is wide and flat, despite the moderately sized output iron. The -3dB bandwidth spans from 33 Hz all the way to a HF roll off point somewhere beyond 30 kHz. As for hum – there isn’t any. Careful power supply design and wire routing saw to that.
Qualitatively, the amp sounds much larger than it is. Harmonic content is just right and gives a sense of air and soundstage without any hints of a sharp edge. That single ended mojo sound is there, just not overdone. Bass is not overwhelming, but it is tight and not flabby. With efficient speakers you will be amazed at how much musical energy 3 watts of output power delivers. While the amp was designed to pair with single full range drivers, I had no trouble running my old three-way Pioneer ‘eviction notice’ speakers to party level volumes with this amp. As with most of my builds, this one is designed around my soft spot for female vocals, and it doesn’t disappoint. Ofra Haza goes from ethereally haunting singing Love Song, to downright sultry and decadent in Temple of Love with the Sisters of Mercy. That said, the debut song selected for this amp in front of others was ‘Deutschland’ by Rammstein. Delivered through a pair of modest Dayton Audio 8” full range drivers in an open baffle setup the end result, was in a word – Tempestuous. Absolutely the best crowd reaction I have ever had with any of my amps – including DHTs. I attribute a good part of that to the synergistic match between the characteristics of the 6AM4 front-end and the 6BQ5 output, although it could also have been the free booze I plied the listening audience with… With no ego I can say that this humble assemblage of iron and glass delivers a magical balance between precision and art that few others can match.
Now for the aesthetics. I was originally planning for a steam-punk theme of some sort, but it just wasn’t going anywhere past wire-wheel polishing the power transformer and choke. Inspiration struck when I binge watched the first season of the Mandalorian. I knew then and there that I had to build an homage to that amazing universe.
An armored steel body painted to match Din Djarin’s original armor from season 1 that was experiencing structural integrity issues. There are some blaster burns, as well as some damage from other ‘kinetic’ engagements. One puncture on the top deck has been patched with tantalum foil to prevent a radiation leak. Unlike those over-confident Imps, the thermal exhaust port on this amplifier incorporates a pure Beskar steel shield plate. No pesky teenagers will be exploiting a weakness there.
The front panel is of rare Ironwood from Mustafar, full of unpredictable Sith energy absorbed over the tree’s millennial long lifespan before being smuggled off planet.
The front-dial indicator monitors… something…important? I can’t read Mandalorian writing. The magic eye tube acts as a power on indicator, and it also modulates with the output signal intensity.
The rest of the build fare is my standard offering – top shelf electrical components, safe grounding and fusing, careful and intelligent wire routing, stainless steel hardware throughout, and lots of bench burn-in and tuning before delivery.
Okay, so I spent some time bringing the stock unit up to full voltage on a variac and let it set overnight – no overheating, weird smells or capacitor barf. That is the good news. The bad news – the RIAA equalization and kludgy balance control make the amp sound not necessarily bad, but just a bit ‘off’ with line inputs.
Going back to my original instincts, I ripped out the entire tone forming front end and balance circuits. Inputs now have a simple 100k grid bias resistor, and the feedback is thru 10k fixed resistors. While inside, I installed an IEC power receptacle, installed a power switch, replaced the coupling and local feedback capacitors, and installed a set of true binding posts to allow easier speaker connections. Here is the ‘after’ picture that you can compare with the ‘before’ shot in the previous post:
I also installed a dropping resistor on the pilot light circuit and made a simple red LED power indicator.
Sound is much better now, and in line with what one would expect from vintage Magnavox – not too mellow, not too punchy, but just right.
Frequency response and harmonics follow. The low end has a bit of a bump to it – maybe to match with the smallish speakers originally fitted to the console. Frequency response is plotted at ~2.5 watts output into an 8 ohm resistive load. The first pair of scope shots are at 1.5 watts (~2.5% THD @ 1 Khz). The second pair are at just north of 2 watts RMS, where you can start to see the odd order distortion harmonics kick up.
Listening with high efficiency (>90dB) speakers at around 1.5 watts seems to be the sweet spot for this amp. It is plenty loud, with lots of headroom available for transients. I have it running in my basement with open baffle Corals and it sounds fantastic.
Available now for $150 + actual shipping. Plug-and-play, includes all the original glass and a heavy gauge IEC power cord. Just what you need to perk up your Thanksgiving.
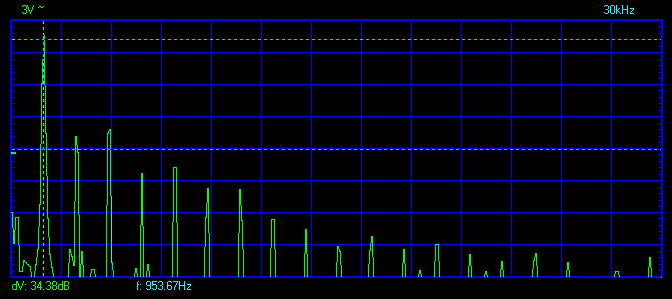
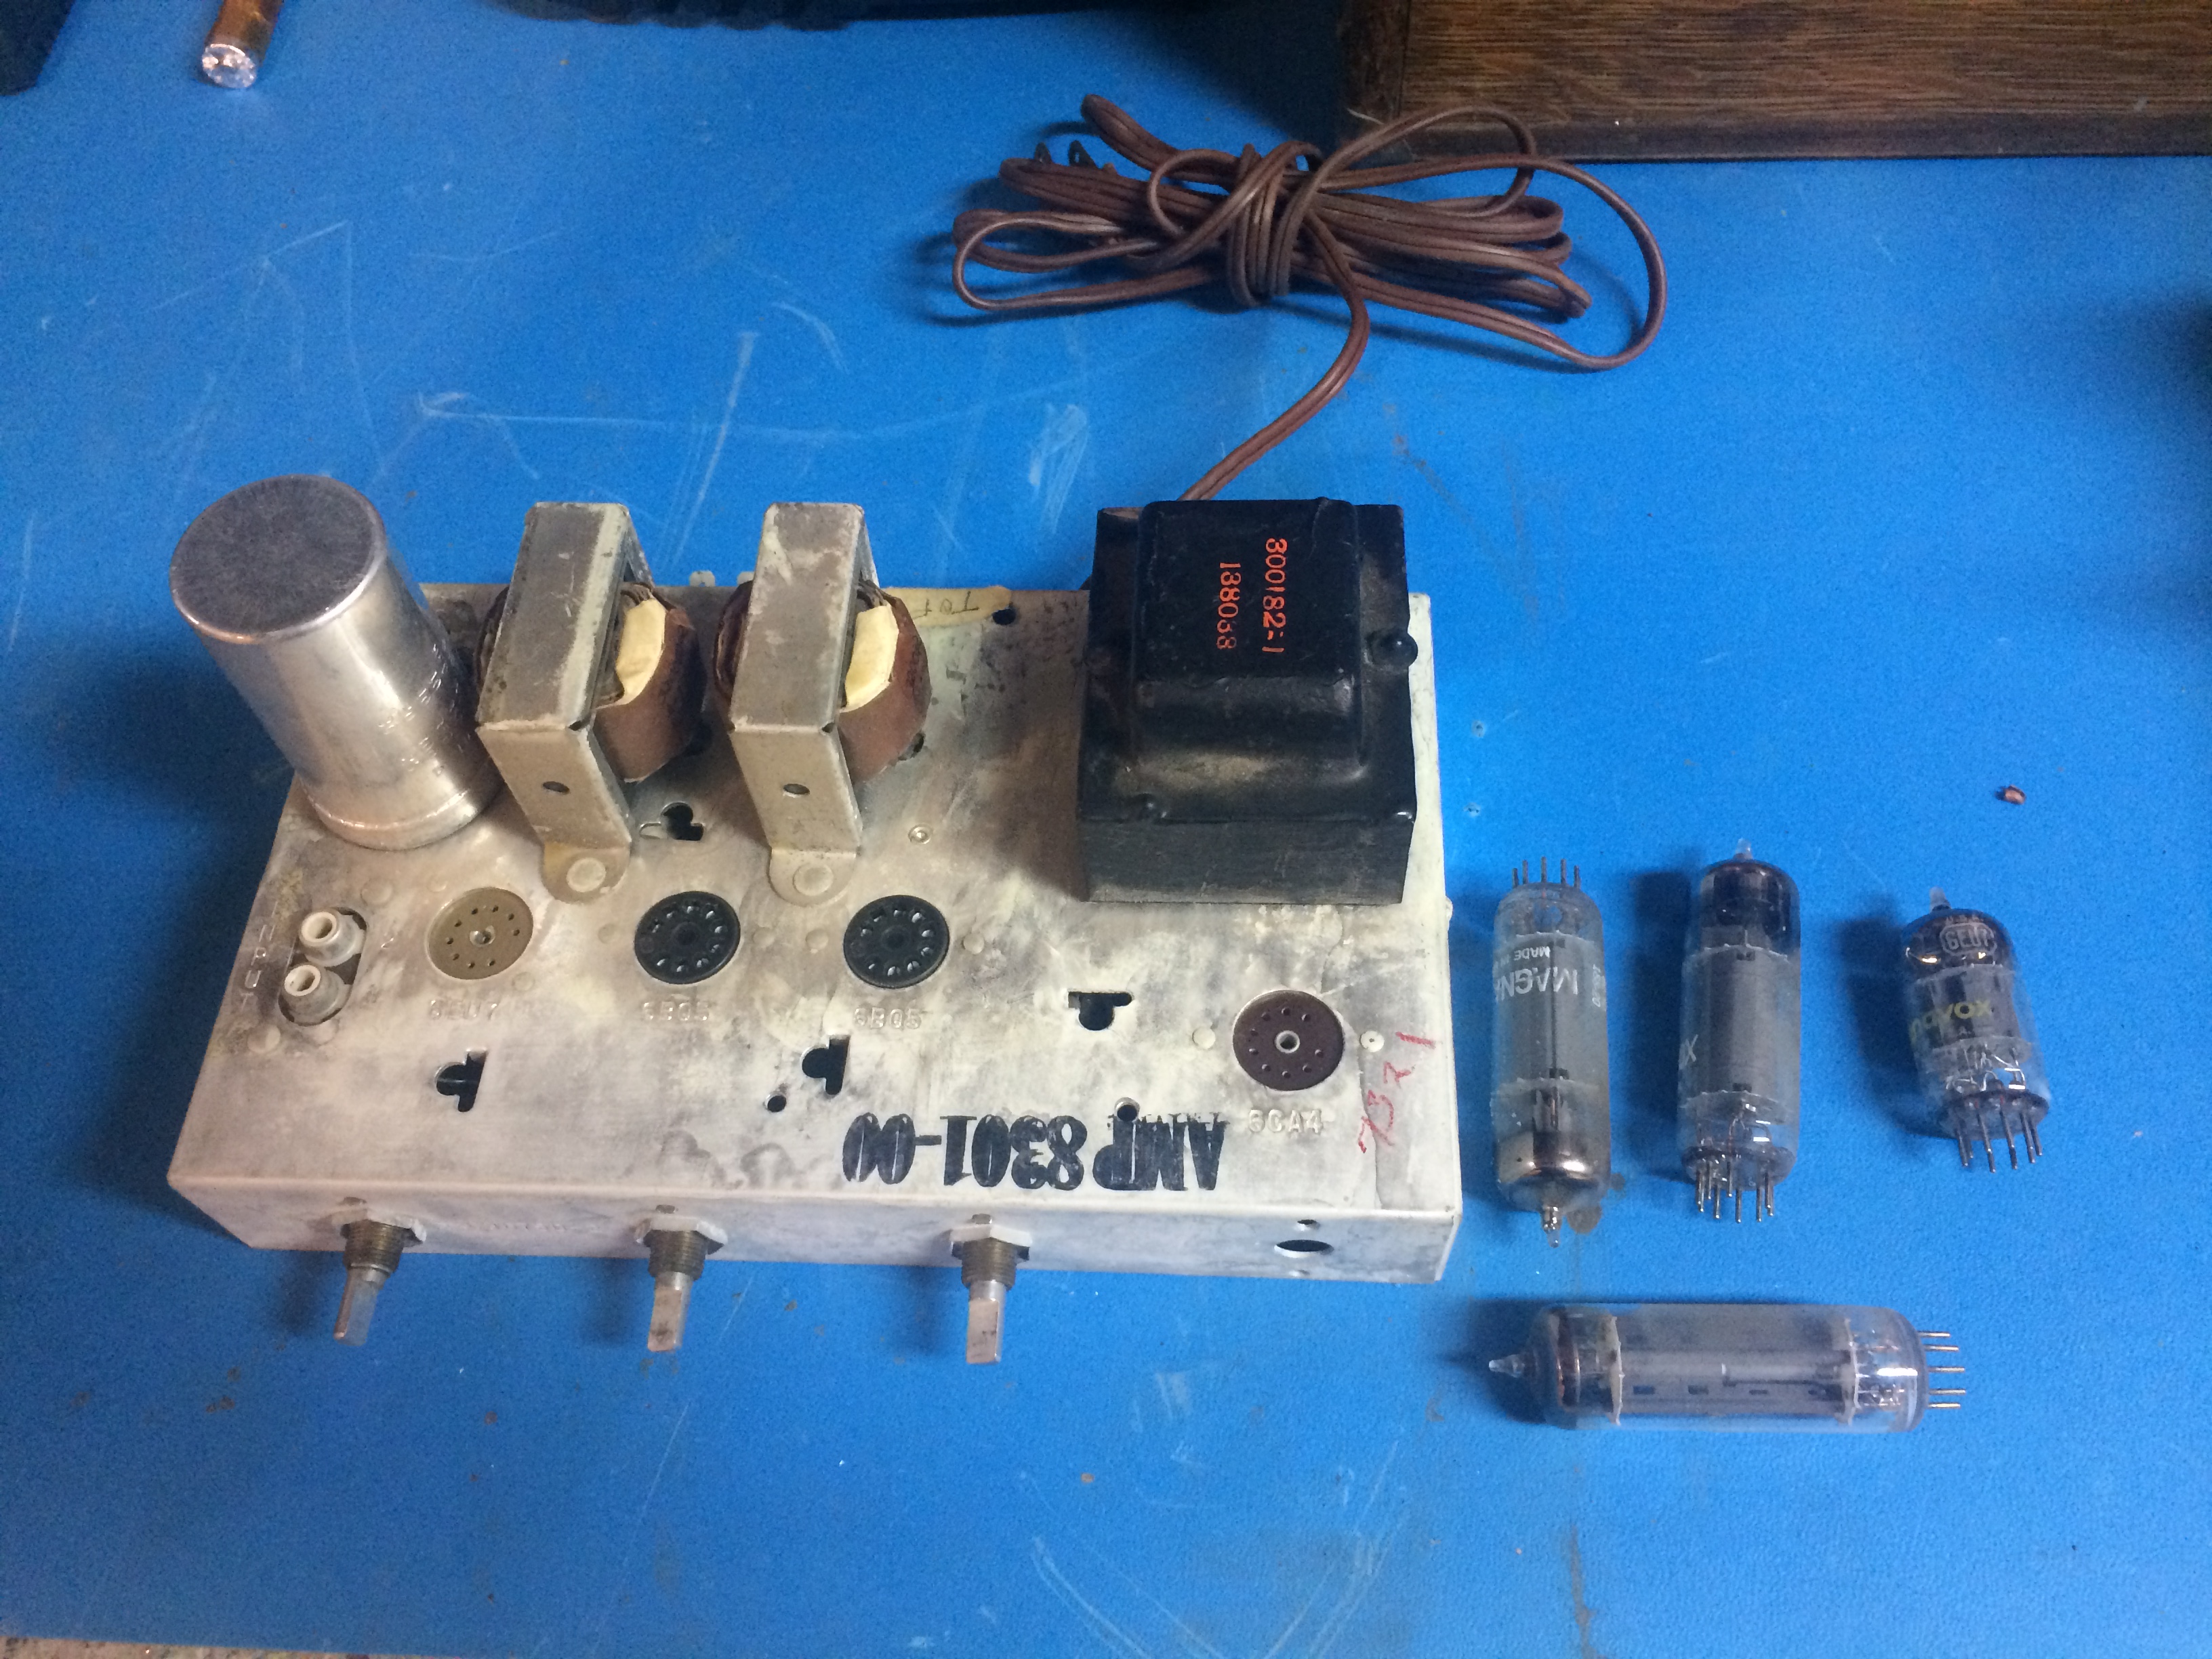
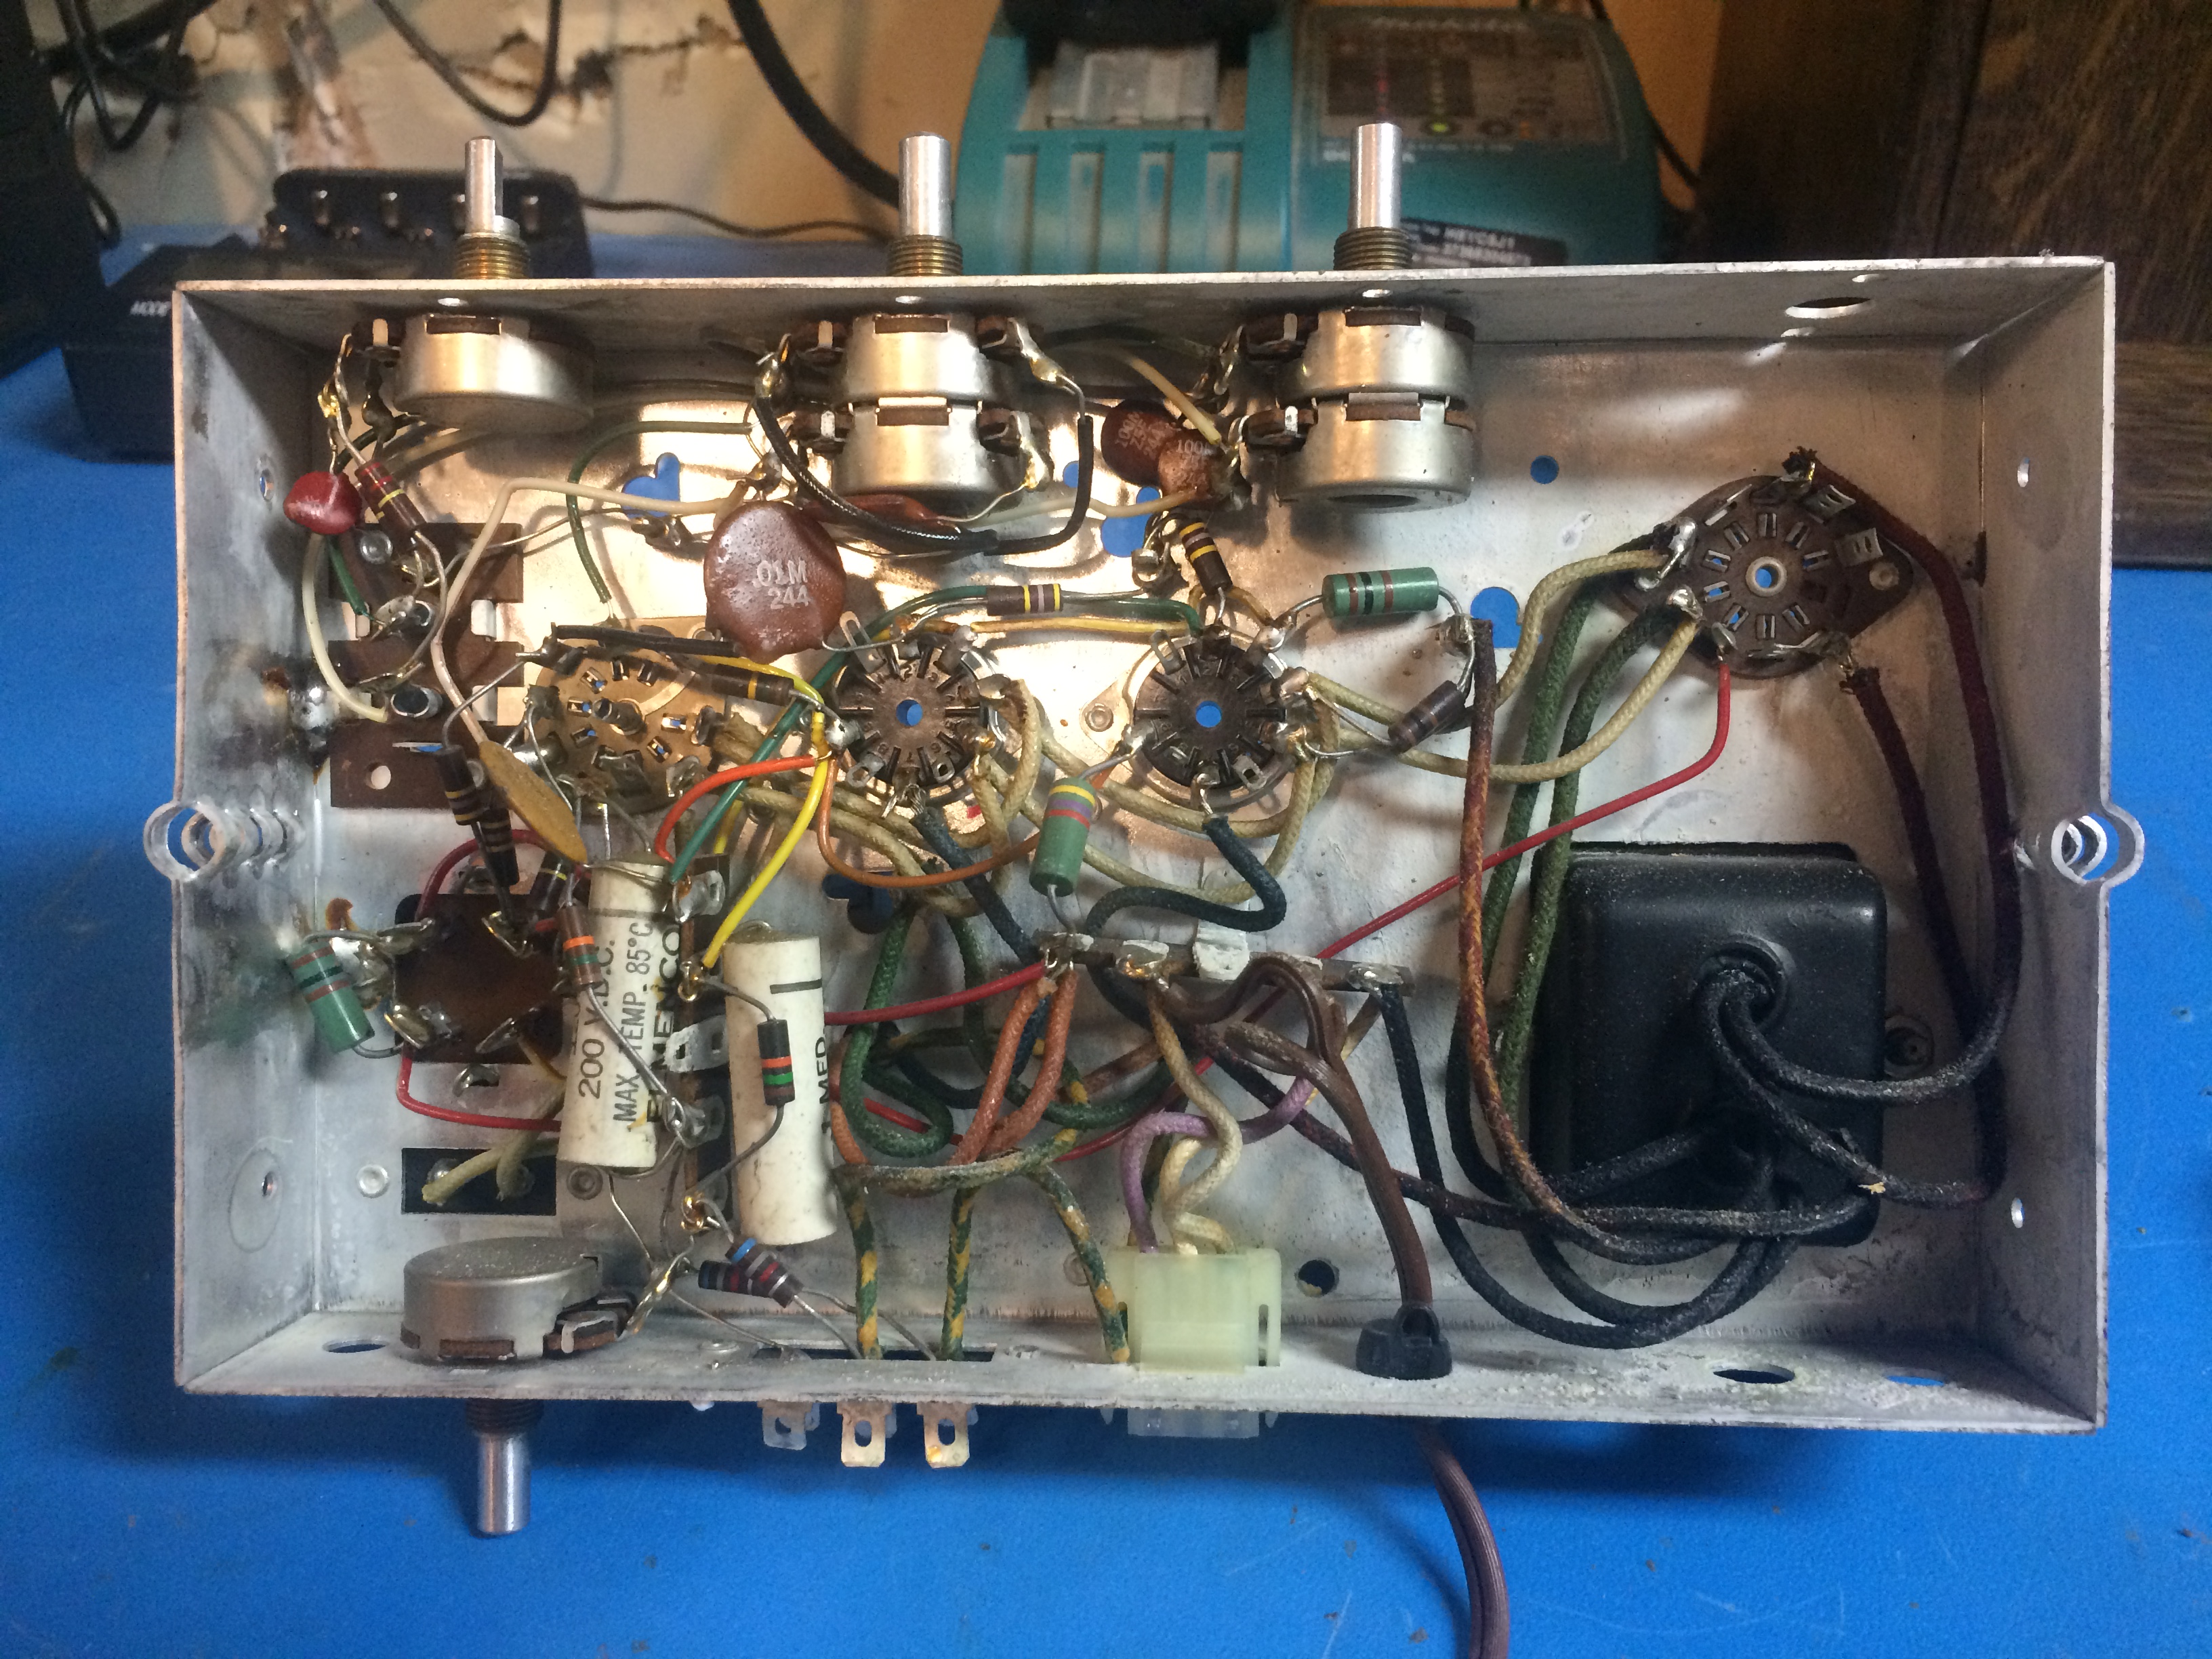
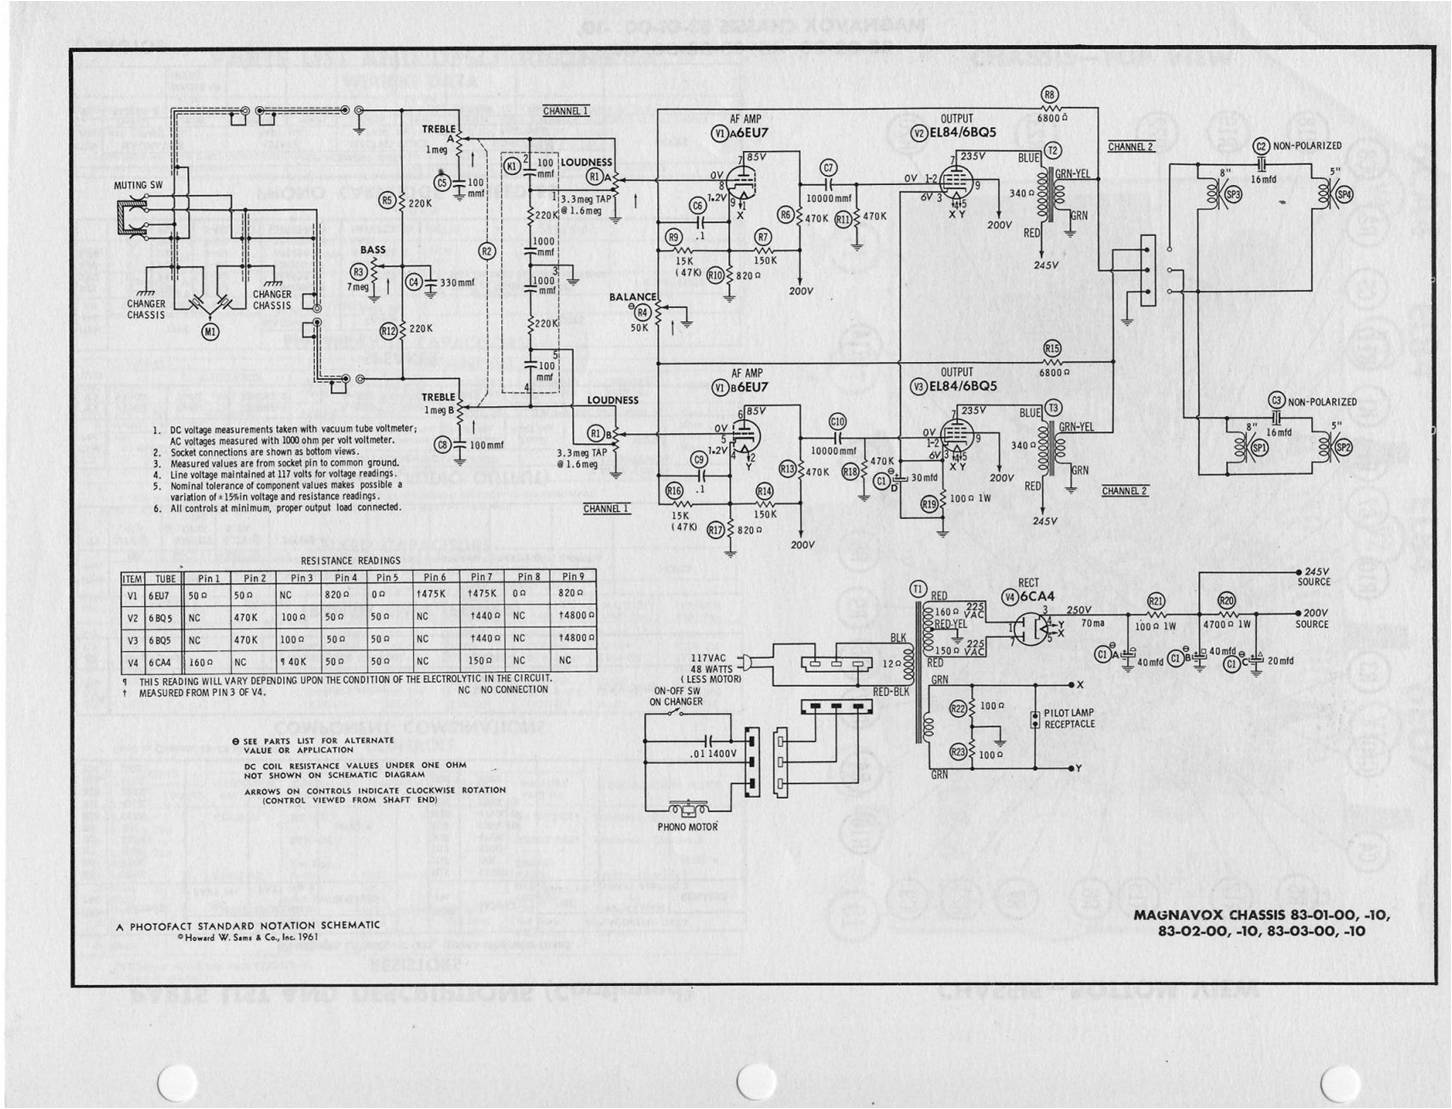
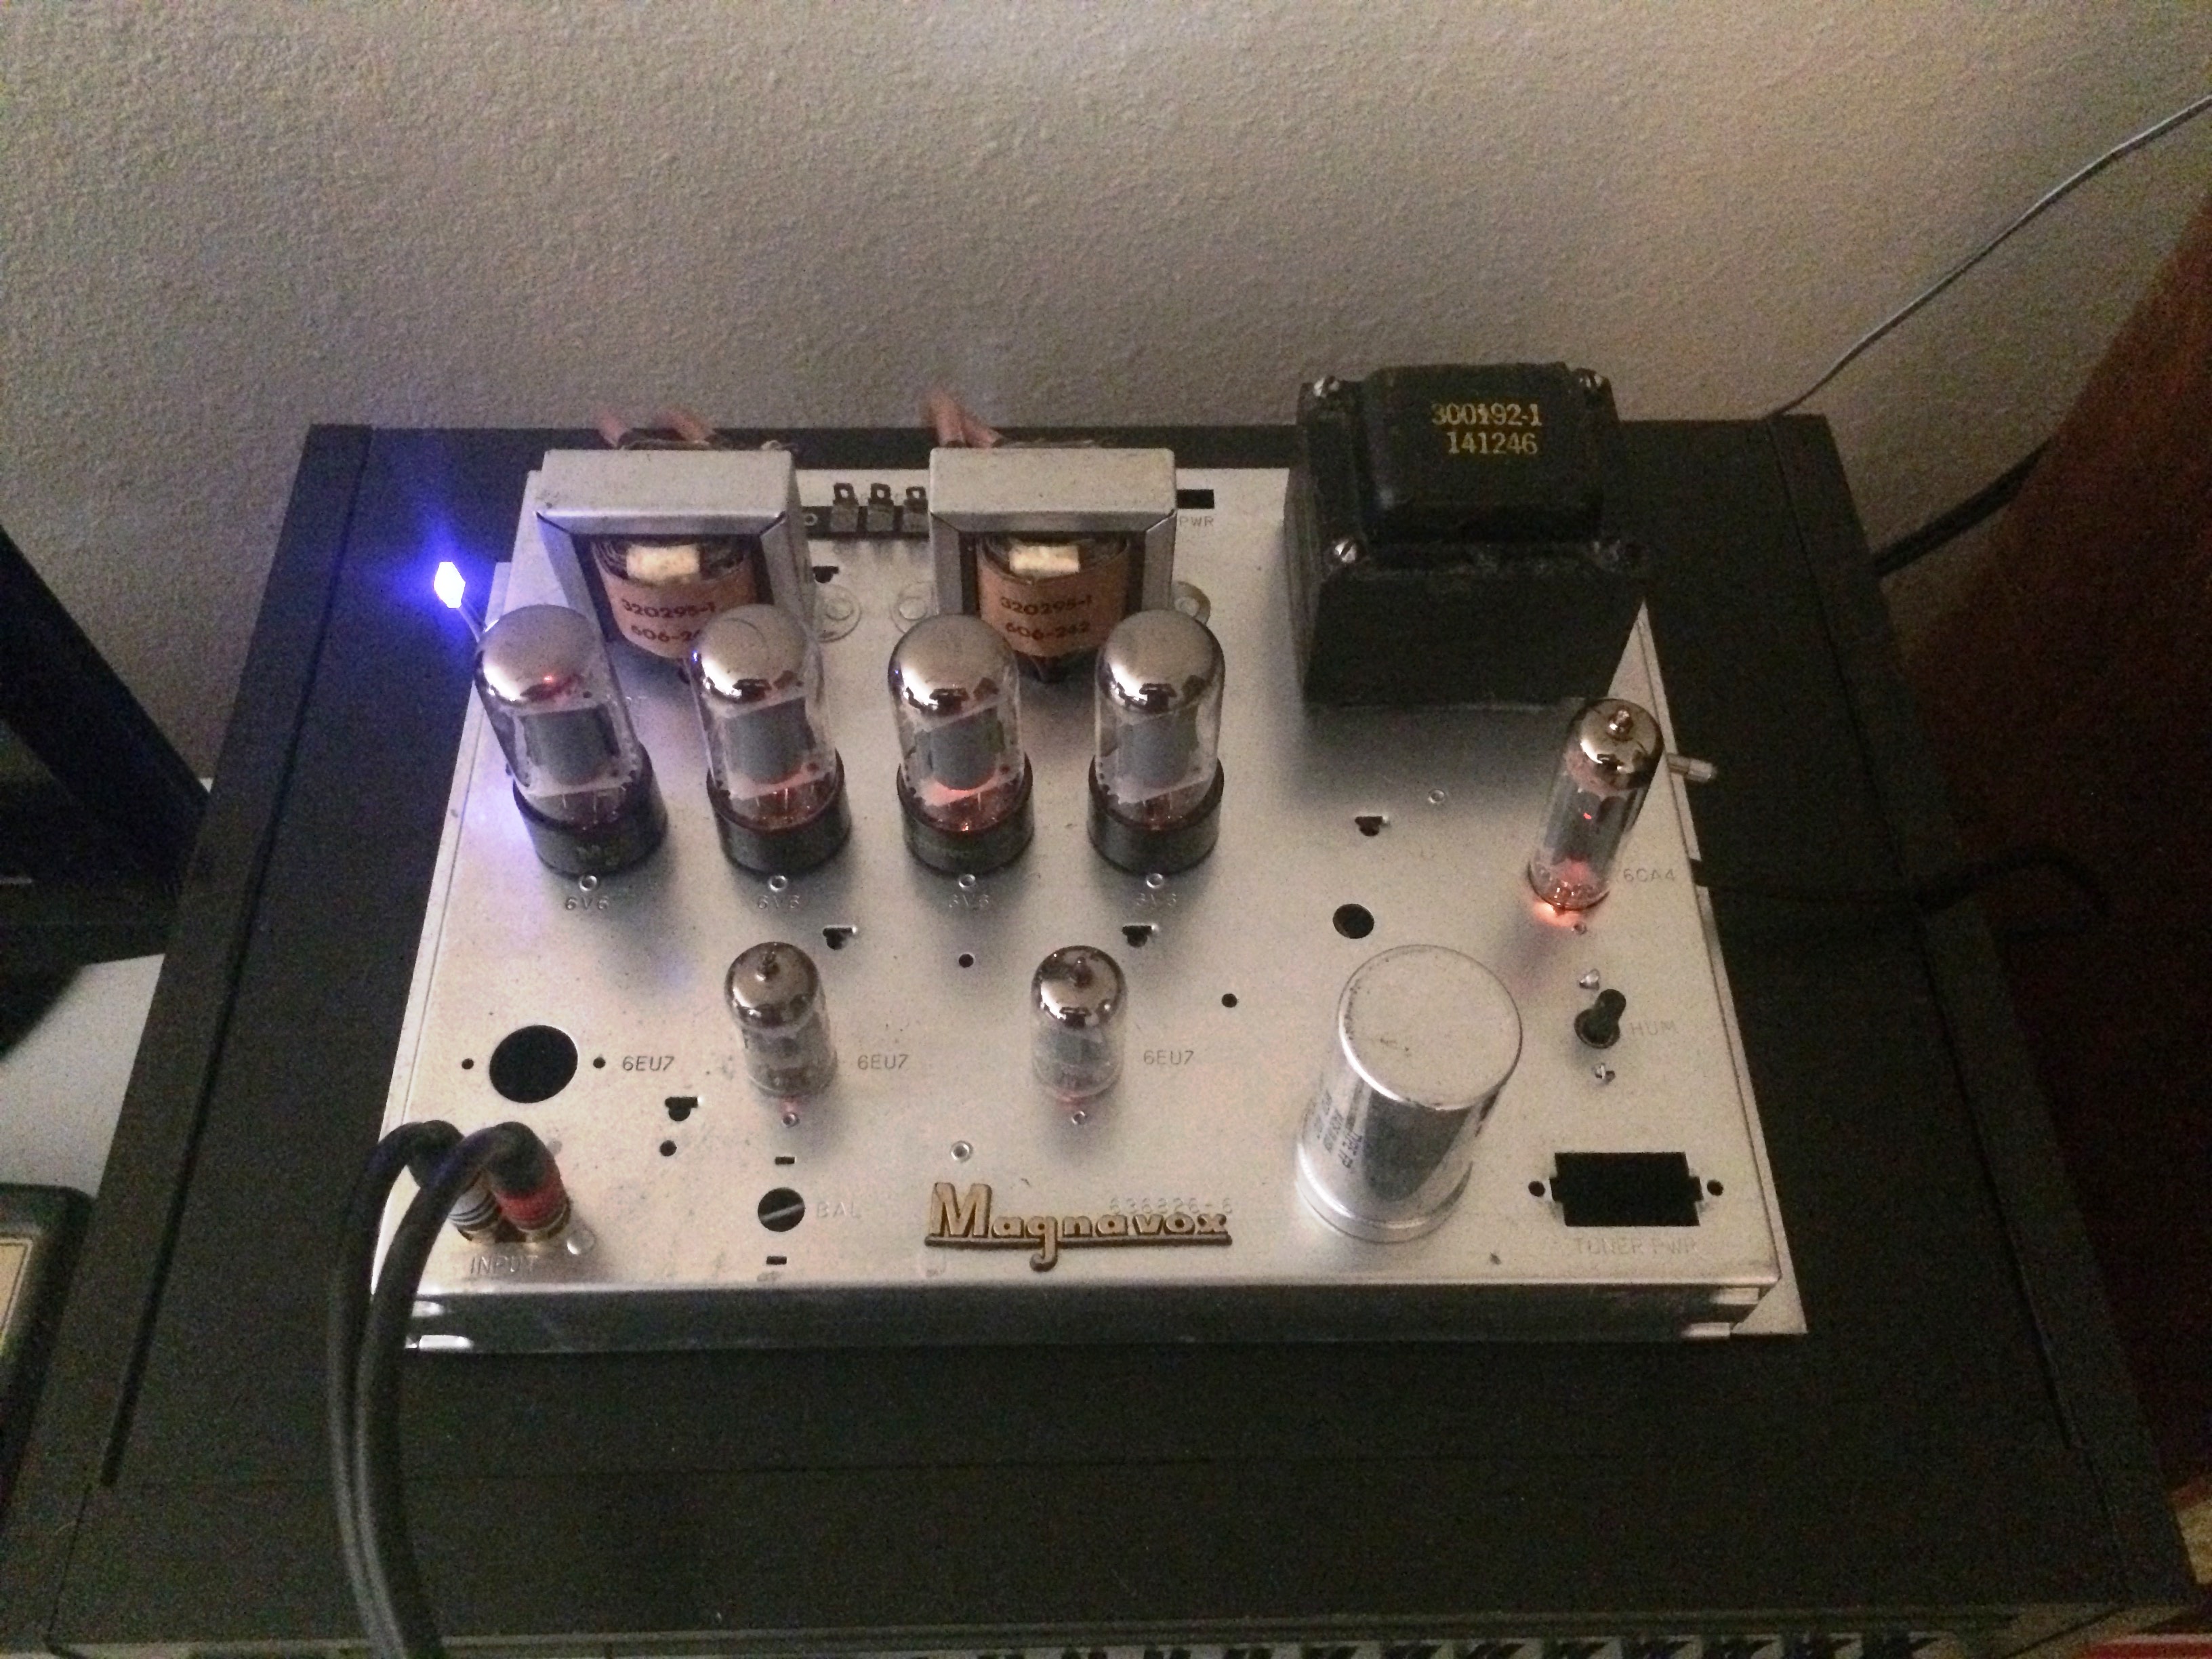
I picked up another Magnavox amplifier a while back, and finally have had time to get it on the bench and look it over. This one is model 8301 stereo single ended amp with EL84/6BQ5 outputs, each driven by individual triode sections of a single 6EU7 preamp tube. Rectification is via a 6CA4 full wave rectifier. All the glass checked out good, and I am in the process of slowly bringing it up on a variac. The schematic indicates that the front end is setup with passive RIAA equalization, and the balance control just attenuates feedback on the channel that you are balancing toward. My first instinct is to just rip the whole mess out, but I will give it a listen before doing anything drastic.
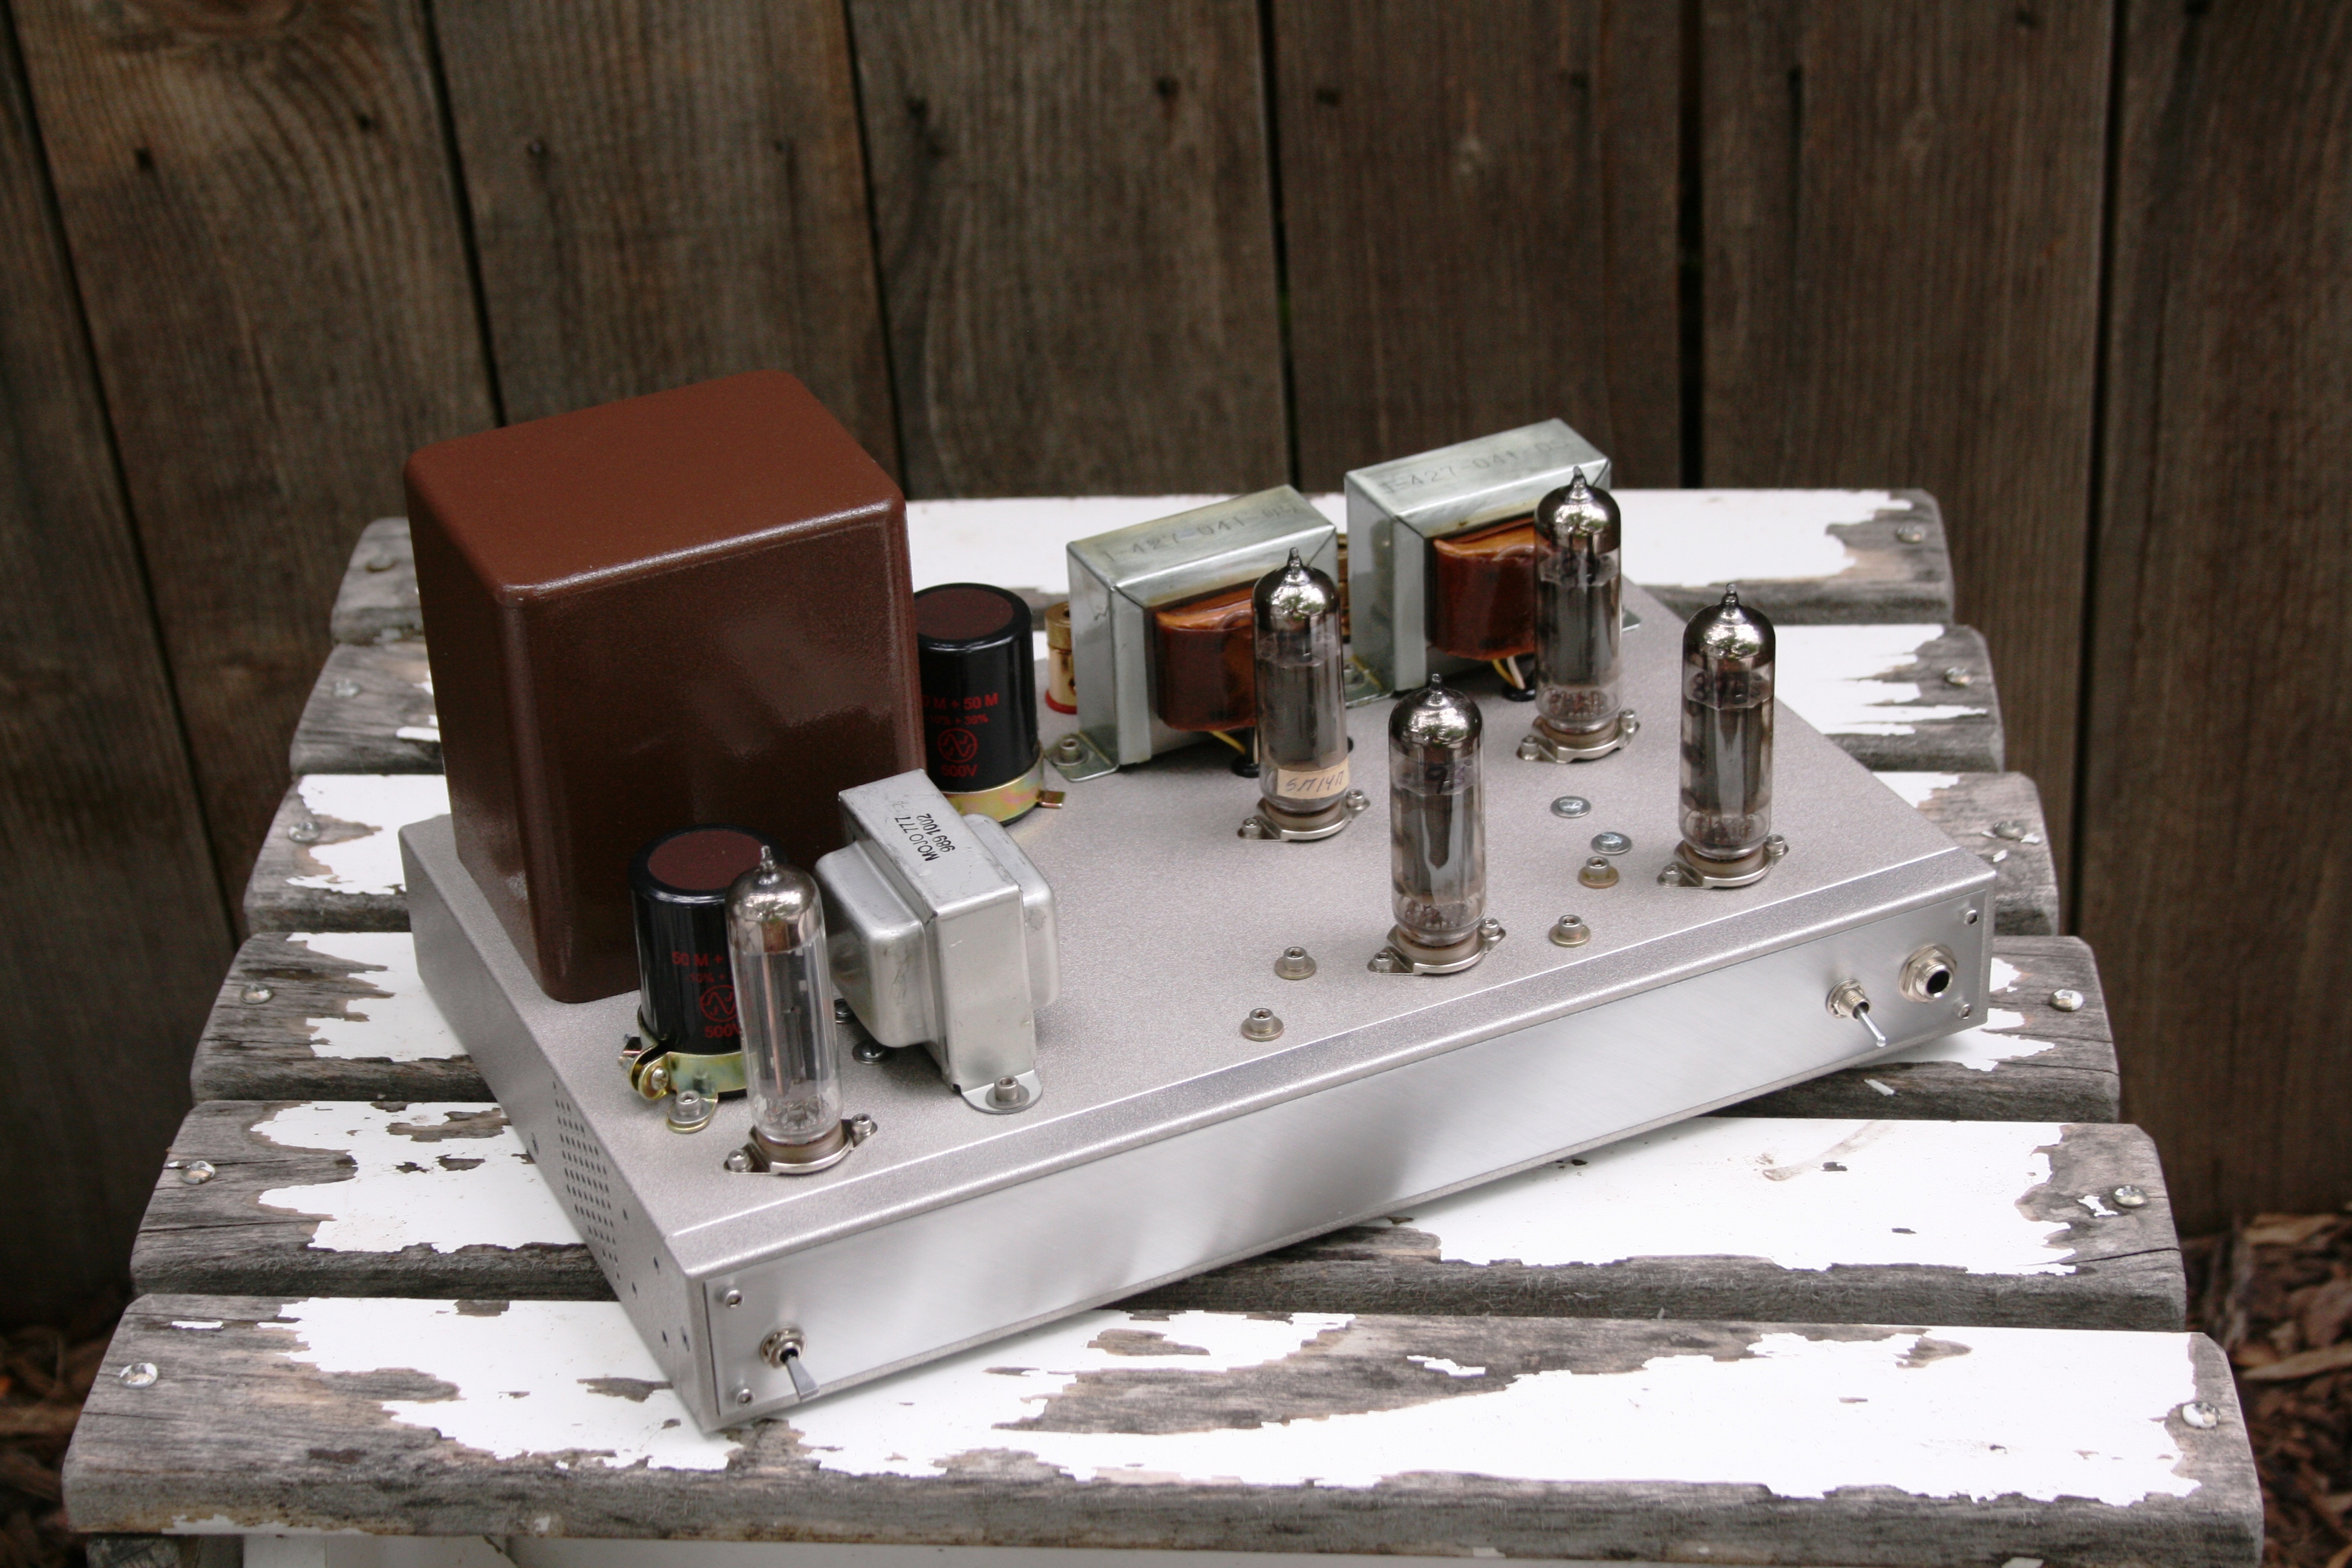
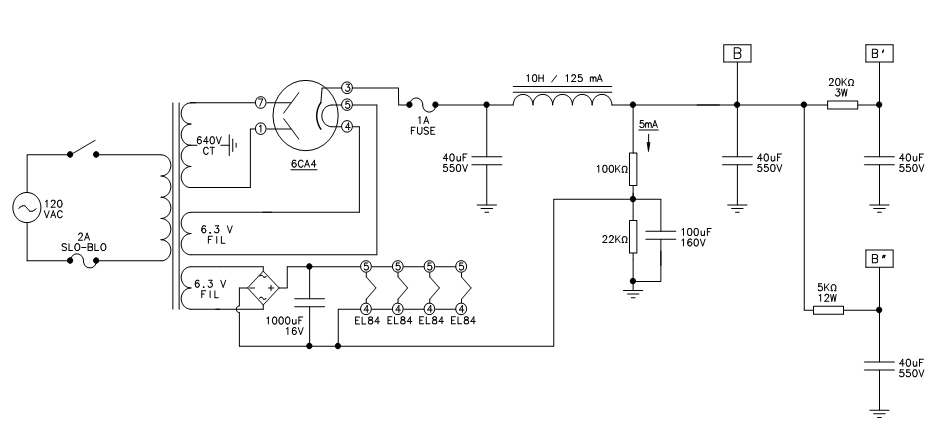
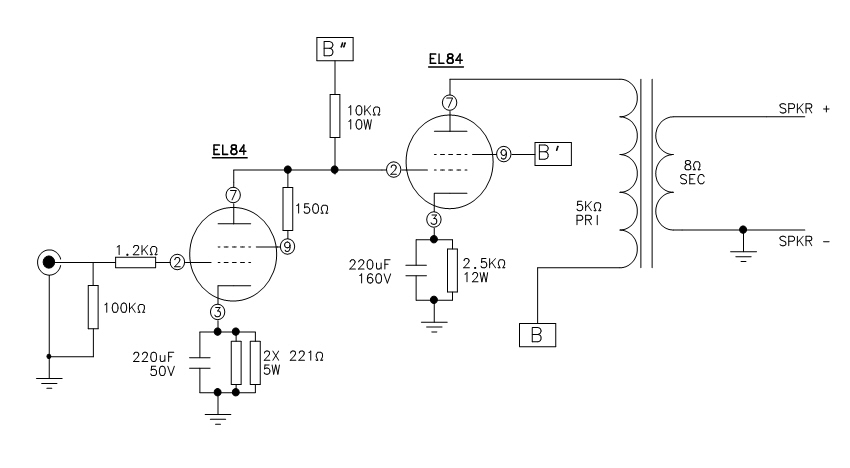
By request, here is the schematic for my dc coupled EL84-drive-EL84 amplifier. If you build one, be sure that you keep the heater to cathode voltage differentials within limits. The voltage divider I used works, but there are other ways to skin that cat. Be sure and follow the resistor power ratings specified and allow for plenty of ventilation – this amp generates some heat. I did not implement any feedback, but you may want to. If you do, an easy starting point would be to remove the cathode bypass capacitor on the preamp tube, and tie a 10k resistor between the speaker (+) and the preamp cathode. If it motorboats, your output polarity is backwards, just reverse it to correct. The power supply is configured to support two output channels. Only one is shown for simplicity
This was a fun weekend project – resurrecting an old Magnaovox Model 8802 Push-Pull 6V6GT console amp.
Required mods were minimal, as all of the original amplifier and its components checked out as completely solid. I did replace the coupling caps with modern panasonic film capacitors with slightly higher values, as well as add a cathode bypass capacitor on the output.
While inside, I also removed the now extraneous tuner wiring, replaced the old two-prong power cord with a nice (and safer) three prong unit, added a locking power switch, as well as banana plugs for easier speaker coupling.
Lastly, I installed a dropping resistor to the pilot light circuit, and installed a slip on blue LED power indicator.
Listening is typical Magnavox – great channel separation and distinction, warm tones, and big soundstage. No HUM!
Does it match up with the kilo-buck craft built amps out there? No, but then it was never intended to. Does it sound better than the new-built Asian commercial models in the same price range? Absolutely. Credit that to the quality output iron and US glass that just isn’t available any more.
This is an extremely clean example of the era. No chassis corrosion, no capacitor barf, no weird smells. Comes completely plug and play. Would be a nice starter amp for those contemplating entering the world of hollow state.
You will need a preamp w/ a volume control for maximum output, but can be driven to a nice listening level direct with an iPhone or other line level or headphone drive source.
For the adventurous, Magnavox thought ahead and punched an extra slot in the chassis for another 6EU7 if you want to add a built-in preamp.
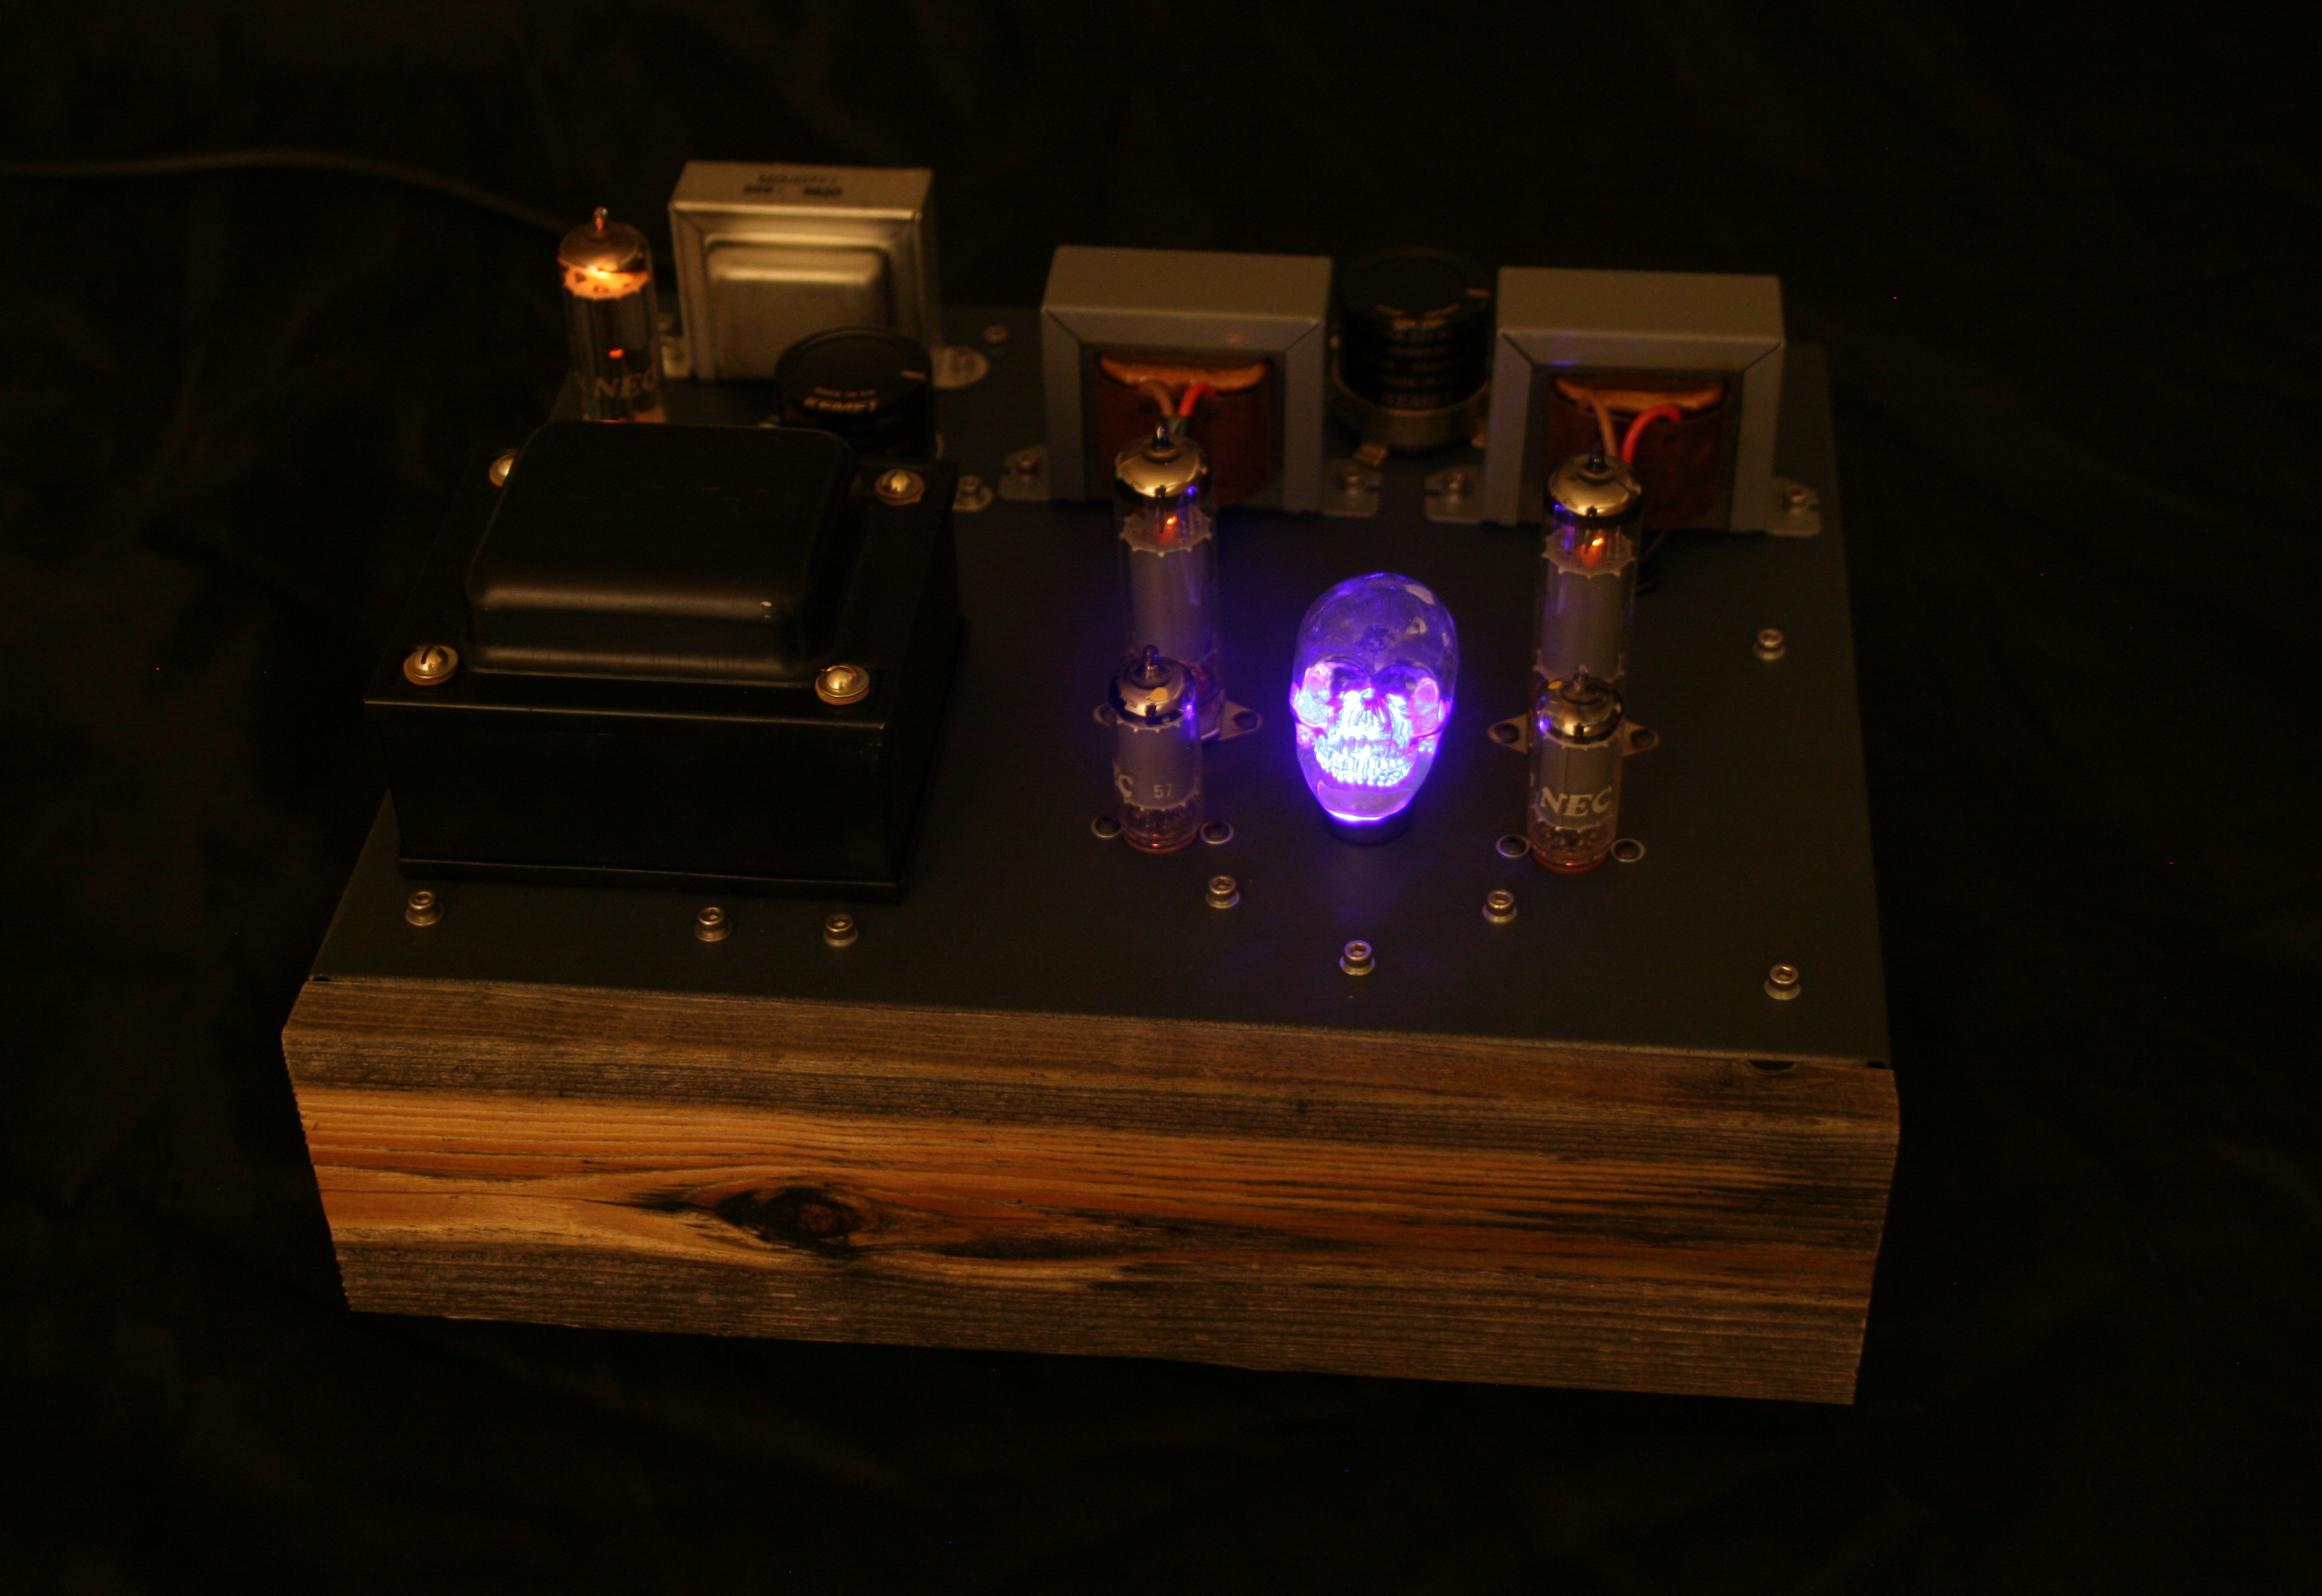
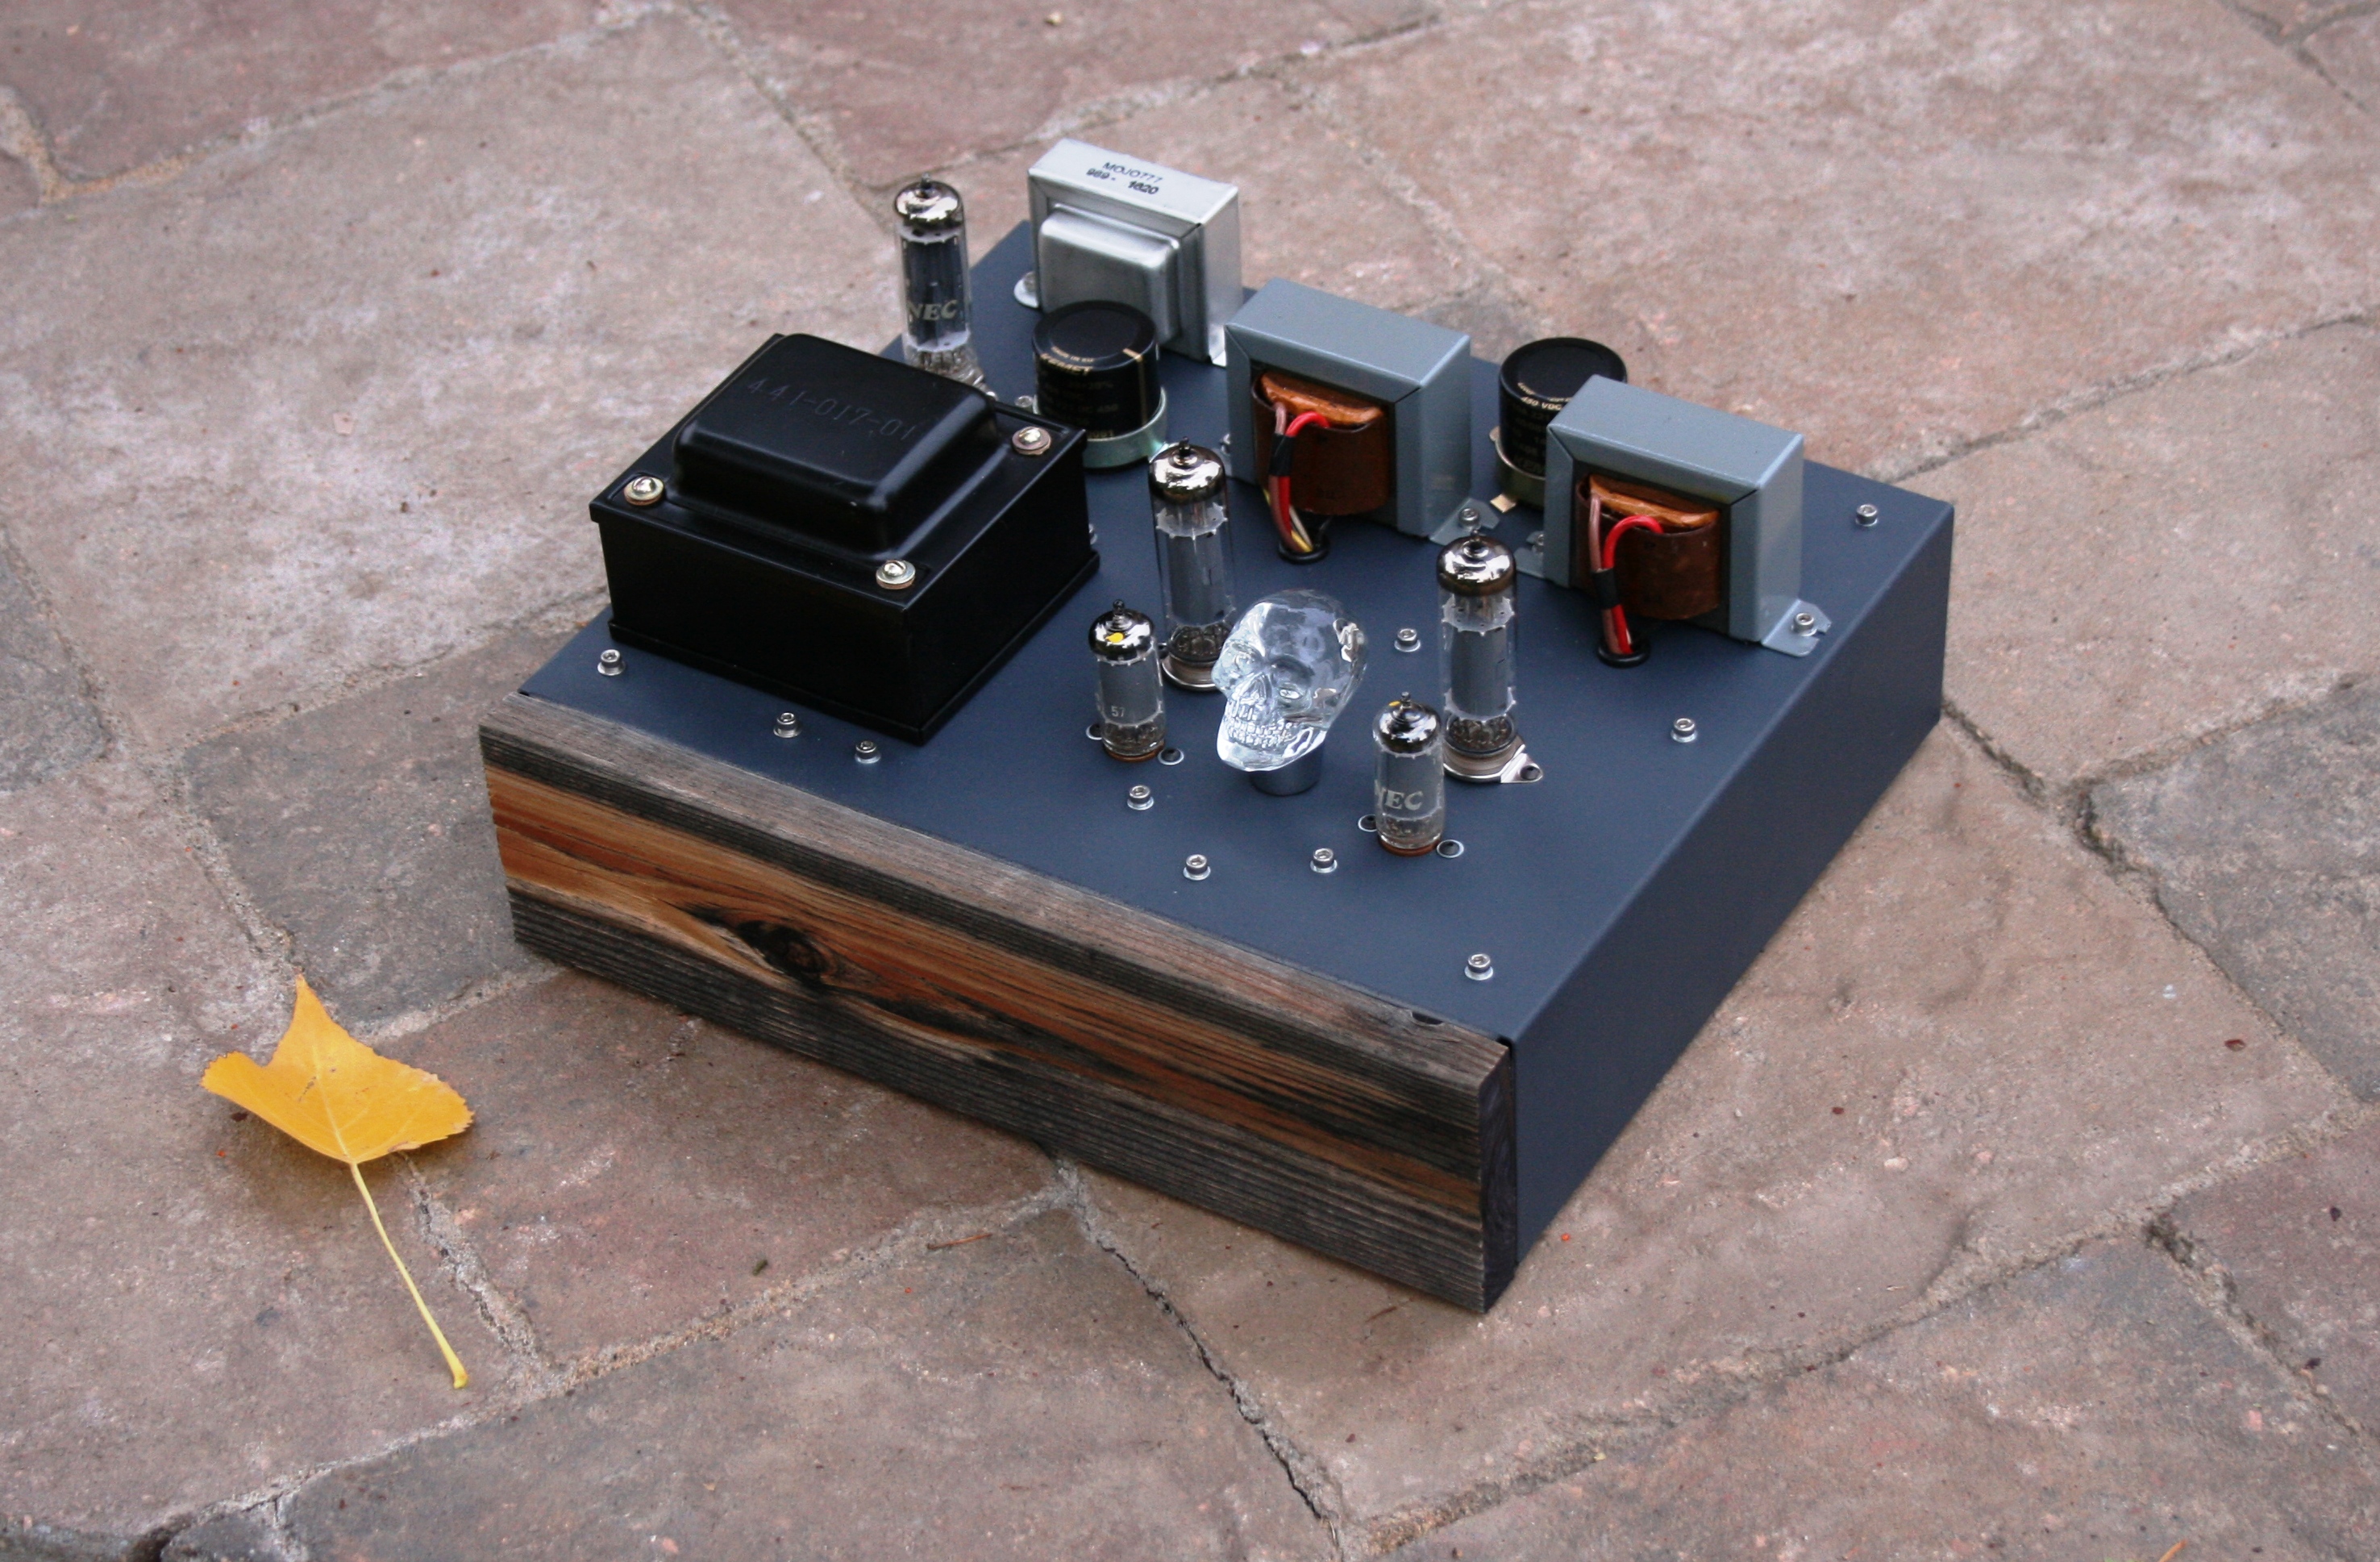
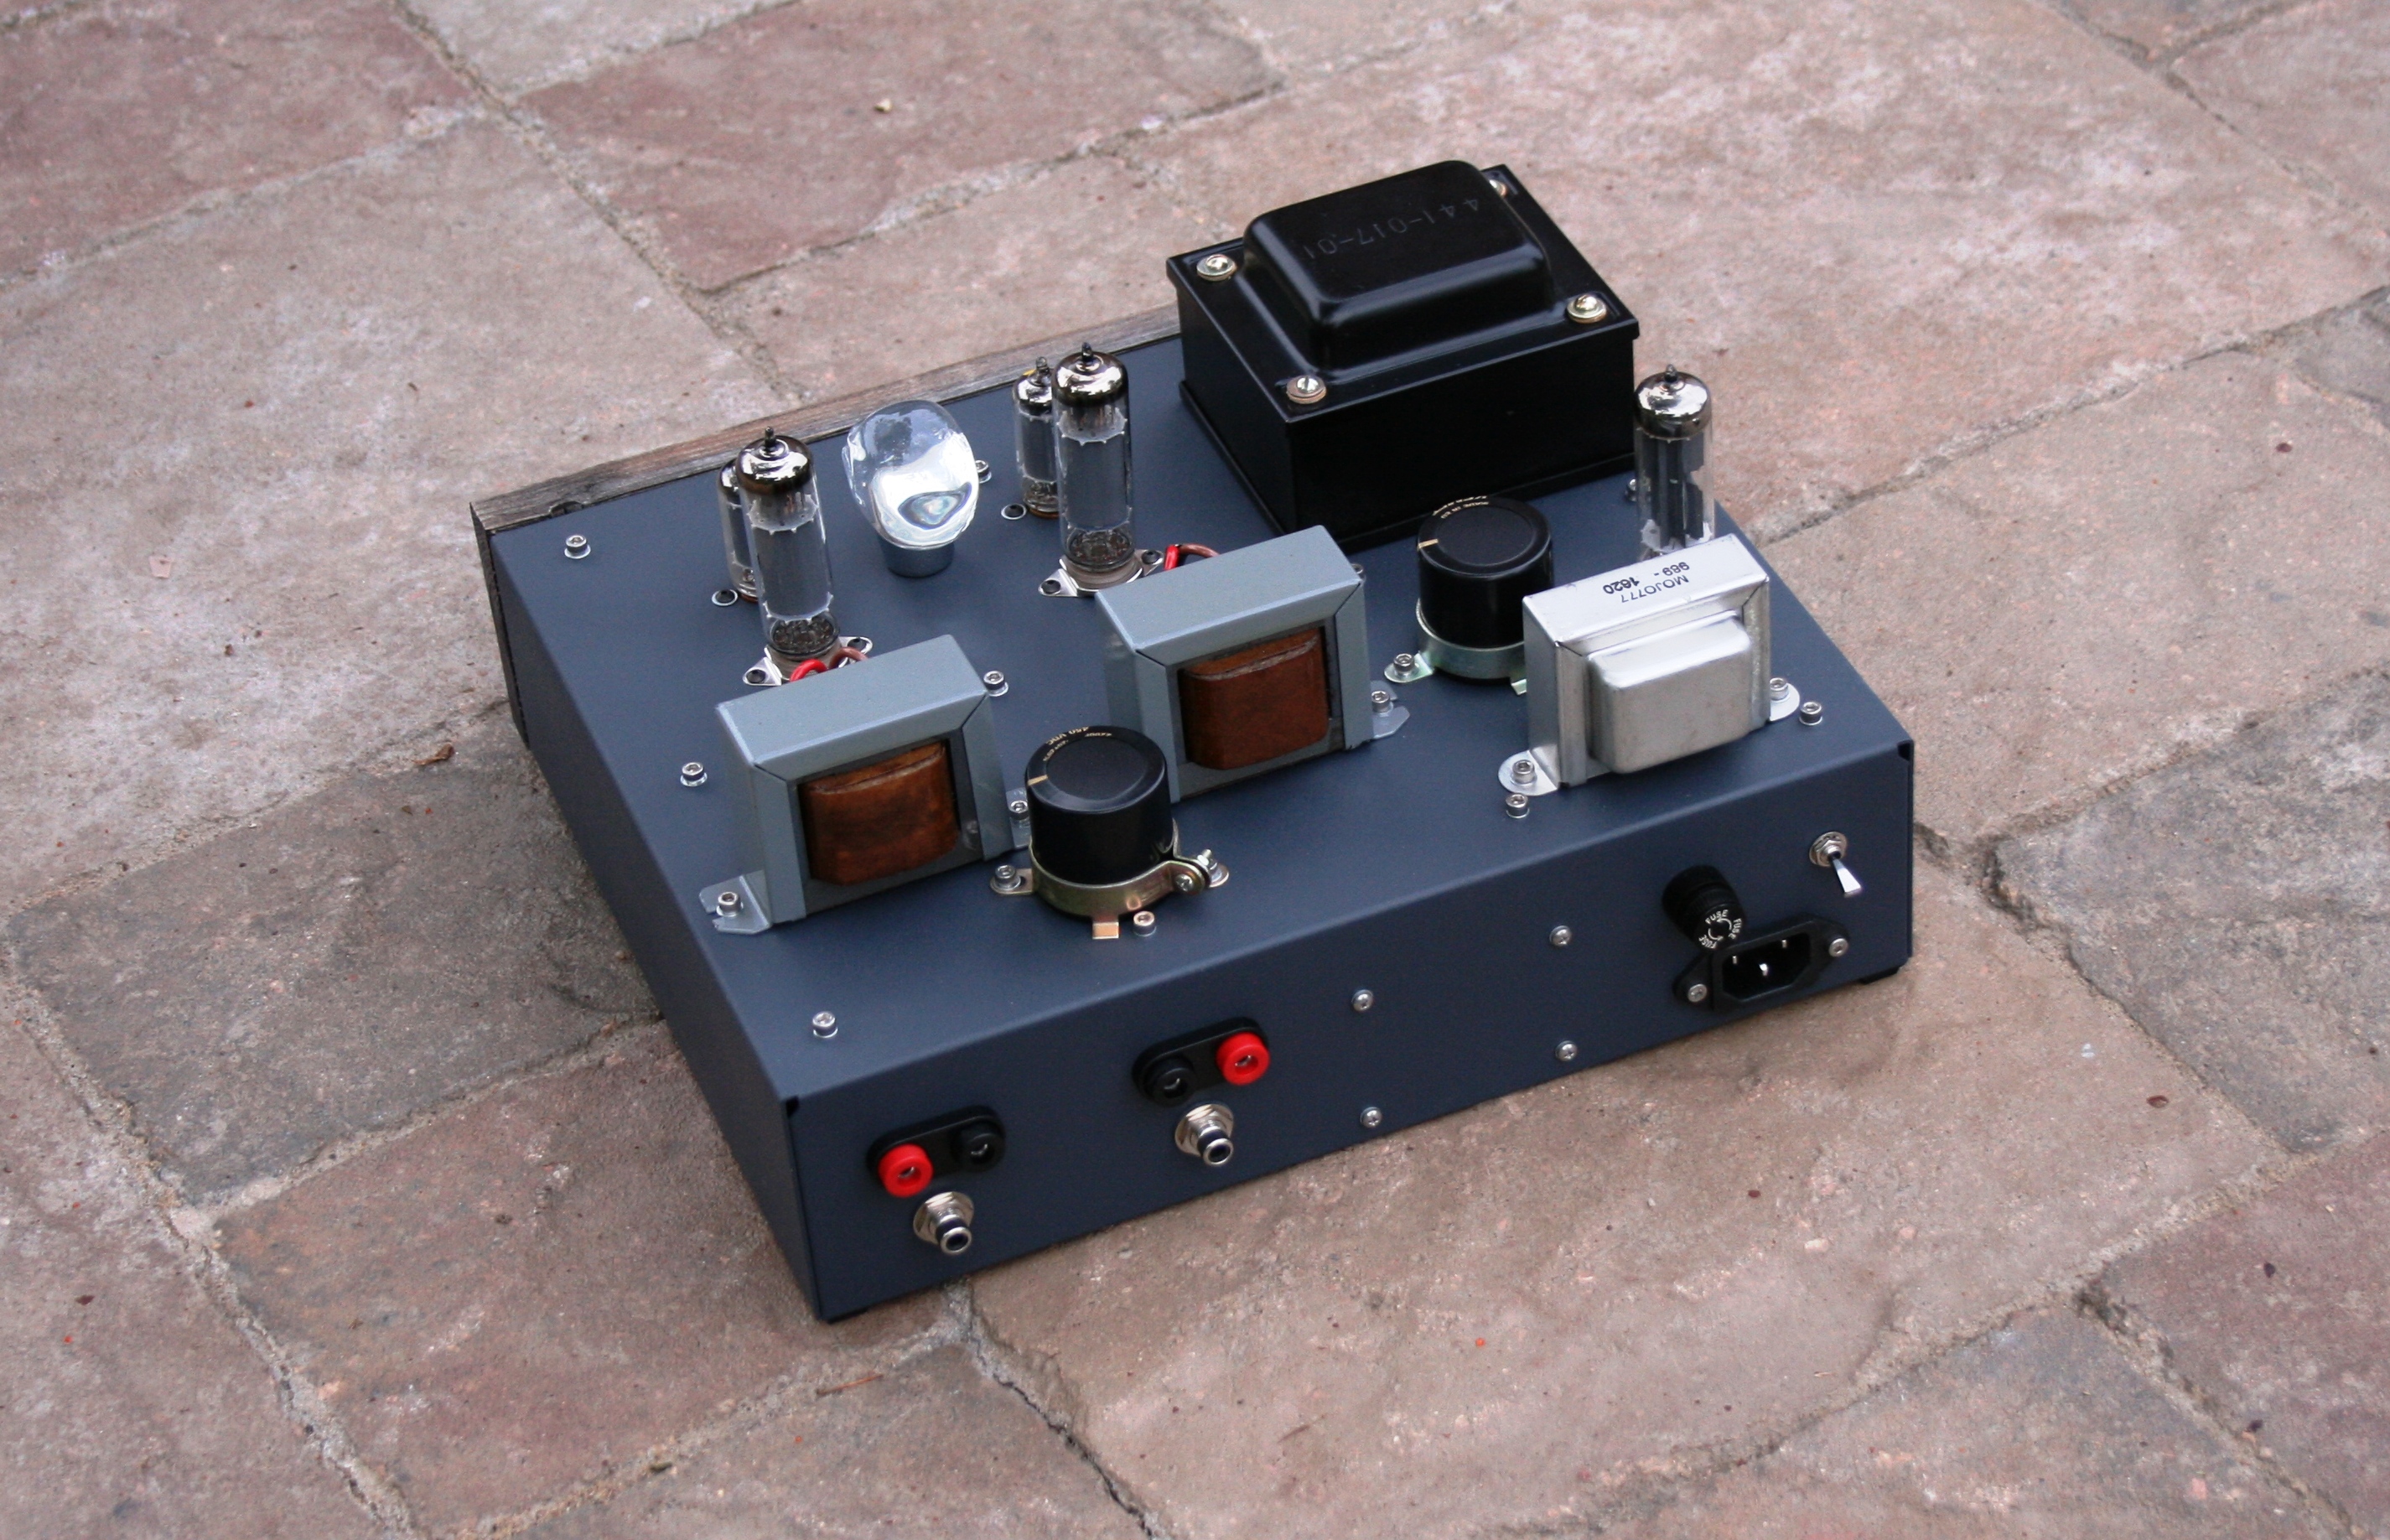
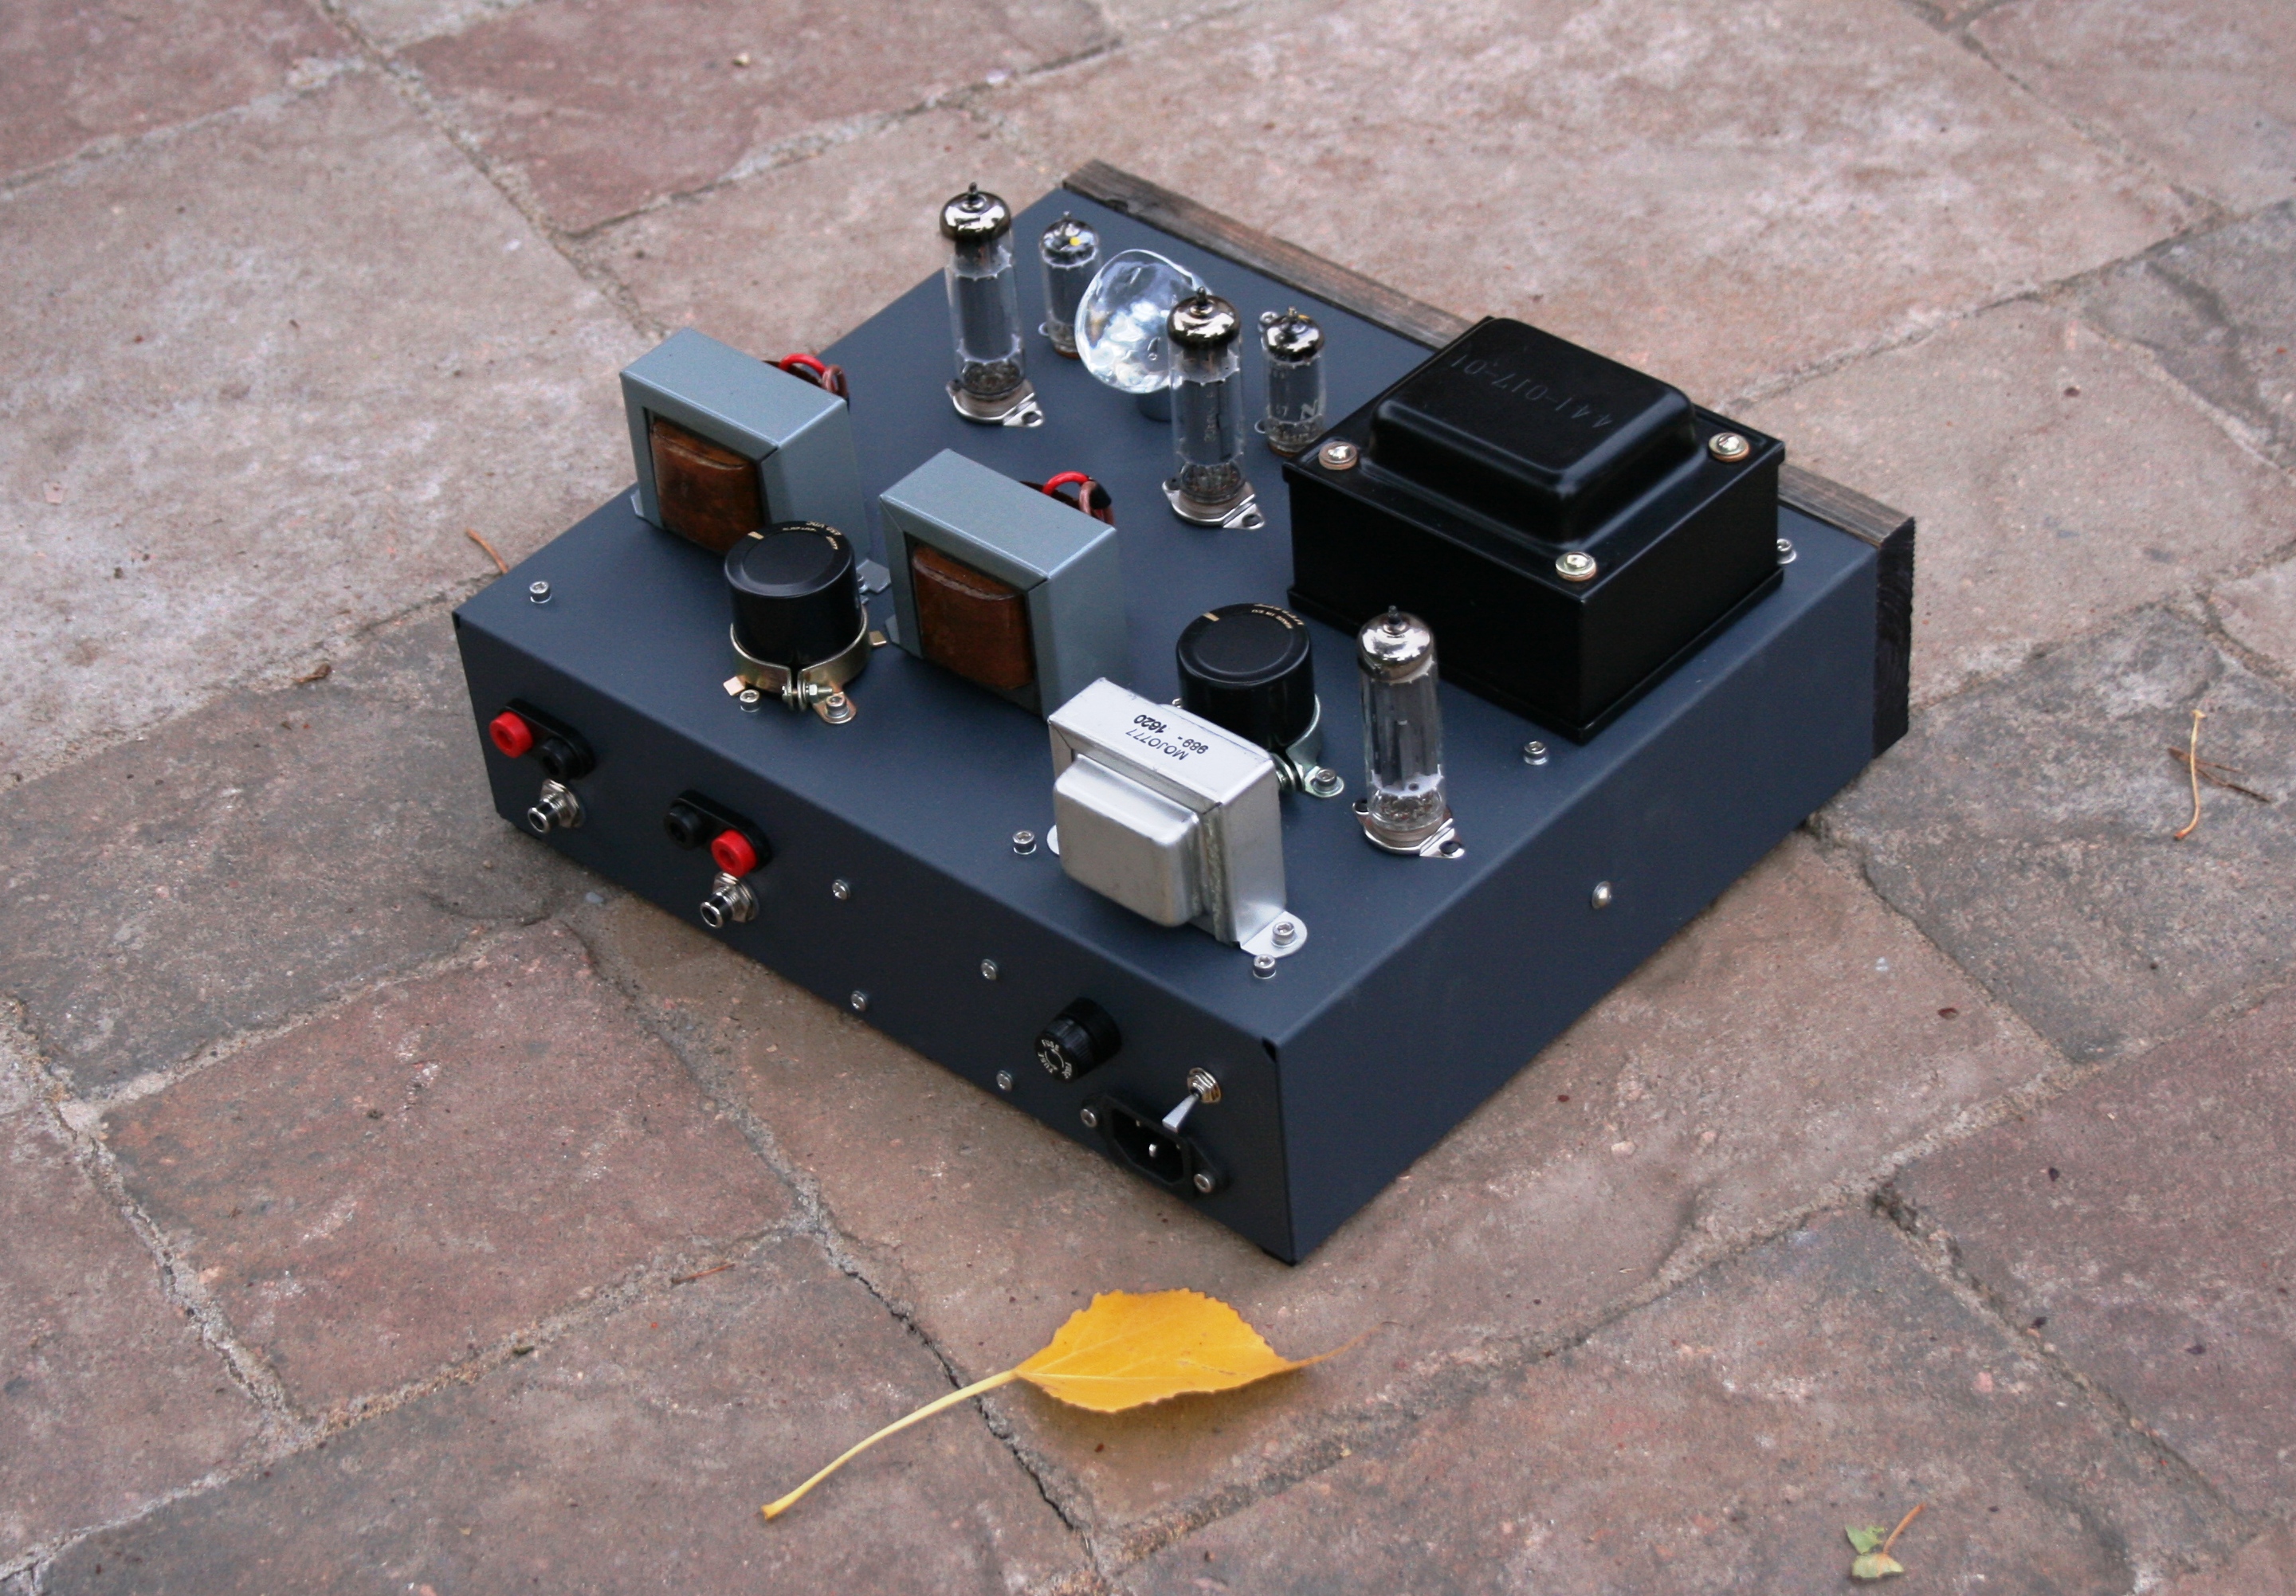
Went with something along the lines of ‘Indiana Jones and the Crystal Skull’ this year. A deep purple UV LED gives the skull a creepy glow, offset nicely by the weathered barnwood front facade. The circuit itself is my own spin on what should be for the ubiquitous single ended EL84/6BQ5. Regulated screen power supply and a triode strapped 6AU6A front end make for some dark magic sounds. More details and pics to follow.
Looking to put it up for auction on eBay sometime this next weekend such that it can be with its new master and cranking tunes on All Hallows’ Eve.
Trick-Shot now has its own page on the site (see above) with all the build blog posts consolidated. It is available for sale here for $1625, and will be going up on Audiogon this weekend. SOLD. Funds from the sale are going to advance the Granit Prime Amp, which will start in earnest this Fall. Updates to follow.